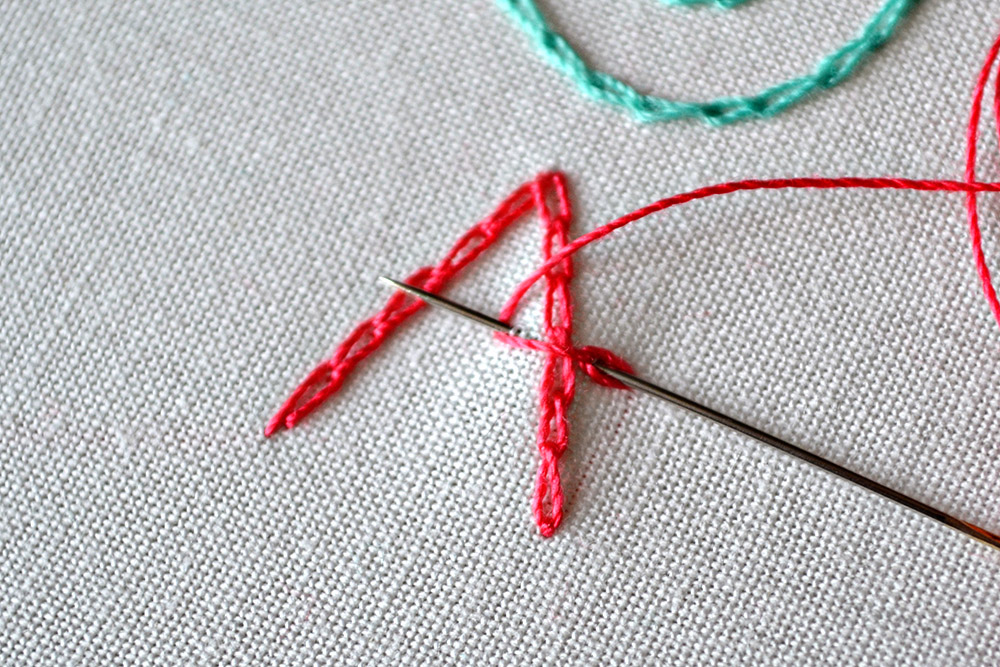
Chain stitch is one of those versatile stitches that you can use for almost everything. It works great for letters, outlines, filling areas large or small, mimicing knit stitches on garments and don’t get me started with the variations of this embroidery stitch (hint: over 30 chain stitch variations are over here in the stitch lexicon)
While a simple chain stitch is not that difficult to embroider, there are circumstances where this stitch might look not as neat as it could. After using the chain stitch A LOT for multiple purposes I want to share some tricks with you.

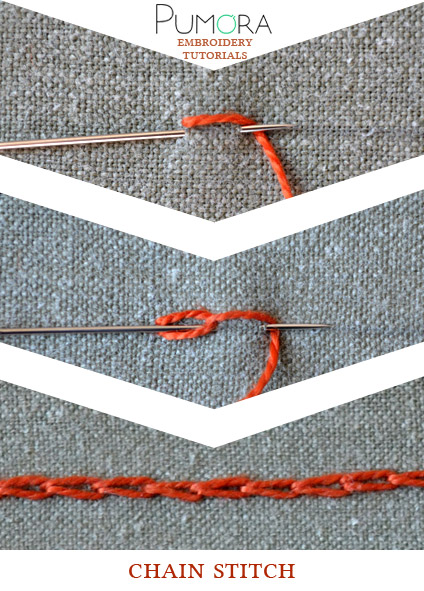
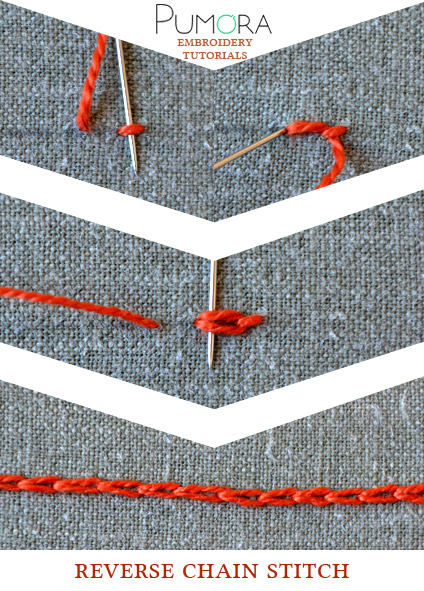
How to embroider chain stitch
First of all, let’s take a look at how chain stitches can be embroidered. There are two ways to achieve this. If you have trouble with the conventional method you might want to give the reverse chain stitch a try.
Chain stitch over a line
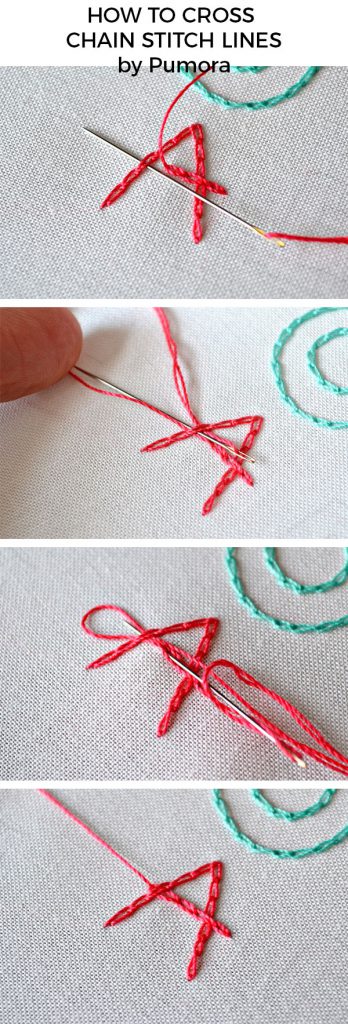
Now, crossing a chain stitch OVER an existing line is pretty straightforward. Here is how it is done:

Chain stitch under a line
Crossing a chain stitch line UNDER an existing line is slightly different. You can end your chain stitch line right before the line you want to pass and start new on the other side. However, you can actually do a chain stitch under that line, too.

Chain stitch edges version 1
There are 2 possibilities to embroider the edges of a rectangle. One way is to just embroider around the edge without stopping the line. The other way is to stop at the edge and begin anew.
This version works best for wider angles. If you want to do a shape like an “A” the stitches get a little bit tilted. I suggest using the second method in these case.

Chain stitch edges version 2
While the first version makes rather rounded edges, the second method produces very crisp edges. It works perfectly for narrow edges, too.

Do you want more tips and tricks on hand embroidery?
Join the Tutorial Alert! It is a biweekly newsletter that contains information about new tutorials & articles on Pumora, tips & tricks, and promotional content like new embroidery patterns or special discount codes.


