When you first start with hand embroidery, a needle, hoop, and scissors are all the tools you need. But as time passes, and you get more and more advanced, you might want to look into tools that make a stitcher’s life easier – sometimes a lot easier. In this article, I’ll introduce you to the embroidery helpers I use regularly and made my embroidery projects even more enjoyable in the past years.
Disclaimer: This article contains affiliate links.
Embroidery helpers are tools that help with specific problems in the stitching process. For example, a hoop stand helps with aching hands from holding the hoop all the time. They might not be needed all the time, but are a great means to make things easier.
Embroidery hoop stands
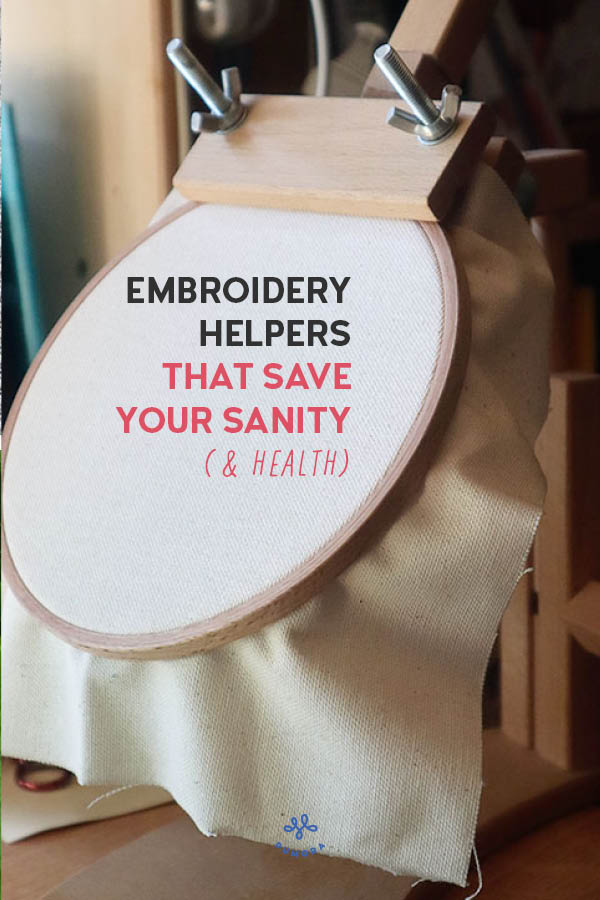
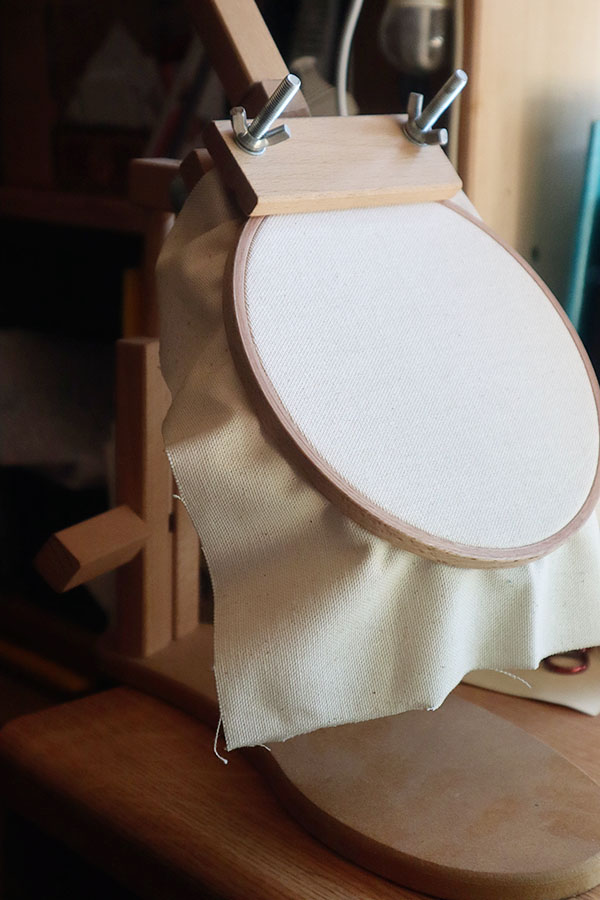
If you would only get one of the tools in this article, I highly recommend an embroidery hoop stand. They are basically a lifesaver for your left hand (or right hand if you are a leftie). Especially if you tend to stitch a lot at a time, you’ll benefit from a hoop stand the most. I got mine after getting cramps in my left hand from clutching it so hard for hours. It became worse every time I stitched. Needless to say, that embroidery wasn’t the pleasant hobby experience I would have liked it to be with hurting hands.
One of the solutions was to get a hoop stand. Let me tell you, it has completely changed the way I embroider! So what exactly is a hoop stand? An embroidery hoop stand is a device that holds your embroidery hoop and can be placed on the floor, table or your leg. Some hoop stands come with an attached hoop that you can’t switch out. I personally prefer the ones that you can clamp in your own hoops. This way, you can use the hoop for multiple projects at the same time, and you can use the hoop size you want. There are hoop stands that you can clamp on your table, but I like the mobility of the seat stands better. They have a foot and can be moved around as you work and can be sat on, too.
Benefits of a hoop stand
- hands don’t hurt from holding the hoop
- you can use both hands for stitching (especially useful for chain stitch or anything knotted)
- posture gets a lot better – I sit much more upright, not like Gollum in his cave like before
- with a floor stand you can let the project stay there without having to move it when not working on it
My recommendation
I have the Sonata seat frame and love to use it. It comes in handy for filming my stitching videos, but I also use it outside of that. If you have very large hoops, this is too small. For the regular sizes, I highly recommend this frame. It can be turned around to sew in the ends in the back, it can be moved up and down and also tilted.
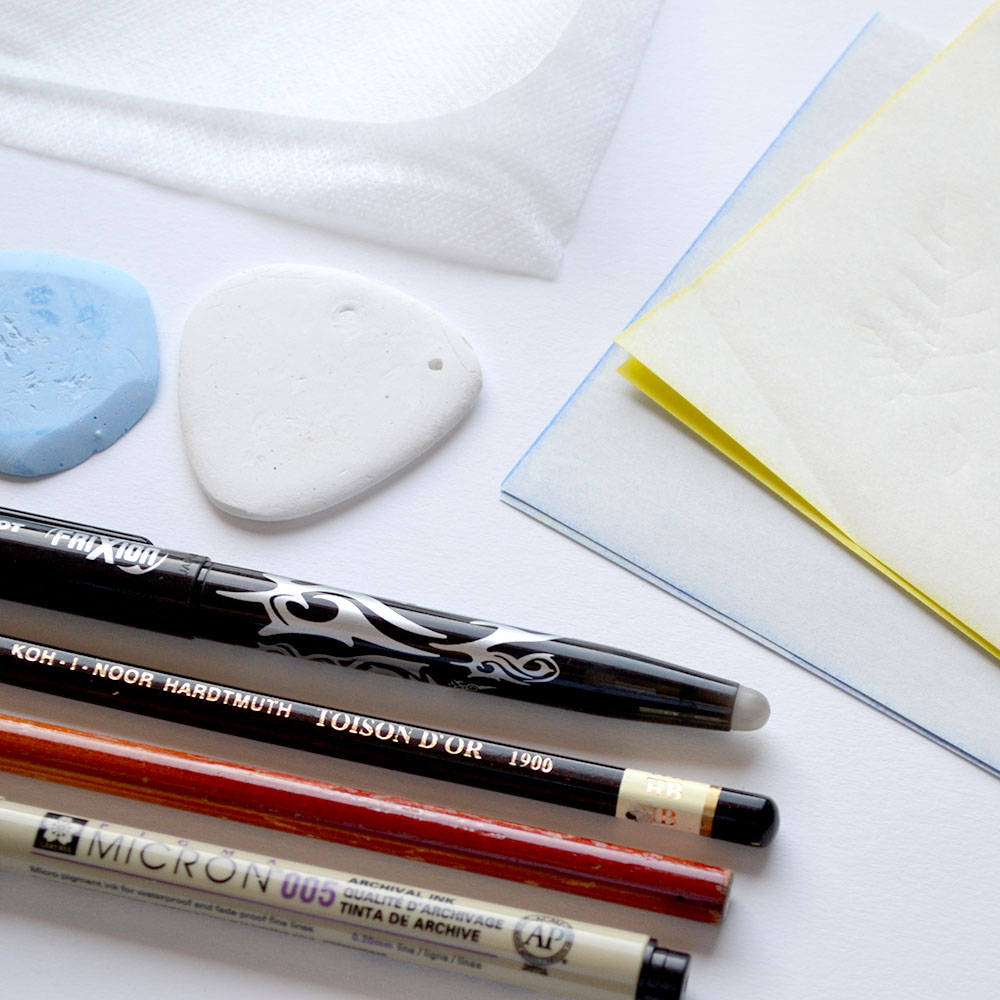
Erasable pens
The next tool is a very common thing, but there are lots of different types of erasable pens out there. If you are still using a pencil to mark your patterns, this might be the right section for you. Pencils can stain your fabric and threads permanently, so be aware to only use a hard pencil and stay clear of the softer ones. I have heard many stories of white threads becoming gray because of pencil lines, and may or may not have had that problem myself.
Not every pen works for everything, so here I want to show you the pros and cons of each erasable pen type.
Water-erasable pens
Lines made with a water erasable pen are water-soluble and dissolve in water. Usually, they come in purple or bright blue. While it only needs a bit of water like from a squirt bottle to dissolve, sometimes the fabric needs to be soaked. So, if you have materials that can’t be soaked, like paper, silks, or other sensitive fibers, water-erasable pens are not an option.
Air-erasable pens
This type of pen disappears after some time. Some disappear sooner and some later. You should only use an air-erasable pen for quick projects. So stay away from these pens for your long-term projects that you’ll need days or even months for. Imagine, you draw an intricate design on your fabric only to discover a couple of days later that it disappeared completely. I don’t even want to think about that. For small and quick projects, they work fine though.
Heat-erasable pens
Heat-erasable pens are the rising star at the moment. I don’t know when it started, but once people realized that they could blow away the lines of a regular pen from the stationary section with a hair dryer, everyone used it! The type of pen I’m talking about here are the ones you can erase with the little rubber on the back. It works like a gel pen but can be erased with friction and the heat it produces. These pens (most use the ones named “Frixion” by Pilot) work like a charm on fabric. The lines disappear with the heat of an iron or a hair dryer.
After testing and using the Frixion for a couple of years, here is my takeaway: If you want to use a hair dryer, make sure it is really hot, and you stay in one place for some seconds. The lines do tend to come back if you do it half-heartedly. Because of that, I personally prefer to use an iron. If you don’t have one, a hair dryer works fine though. The best way to get rid of the lines for good is to wash the fabric first, to remove the gel, and then iron it from the back. This also solves the most obvious problem with this pen: It comes back if exposed to the cold!
So, make sure to only use the Frixion pens on projects that are not exposed to the cold (I’m talking about freezing temperatures here) or wash the item, iron it, and you are fine. If your materials can’t be exposed to heat, don’t use this type of pen!
Chalk pens
Chalk pens are a lifesaver when working with dark fabrics. I love to use them for exactly that. They leave a layer of chalk on the fabric and disappear through abrasion. So if you are working on a project for a long time, the lines will start to blur when your hands move over the fabrics repeatedly. I have come across some very bad chalk pens, even made by big embroidery suppliers. Sharpen the pen to get a fine line every time.
My recommendations
I personally use the Frixion pens for lighter fabrics all the time and chalk pens for dark fabrics. There are white heat-erasable pens out there, too, but I don’t have one. Maybe I would use them instead of the chalk pens if I had one.
A word of caution for pens: Always test your pen on the edge of your fabric first. Some pens react with the fabric or the dye of the fabric. I heard of instances where the blue Frixion pens bleached the color of the fabric underneath. So after ironing, the lines were still visible even though the pen lines disappeared. This seems not to happen with the black pens, though.
Also, I have heard of water- and air-soluble pen lines that reappeared after months or even years.
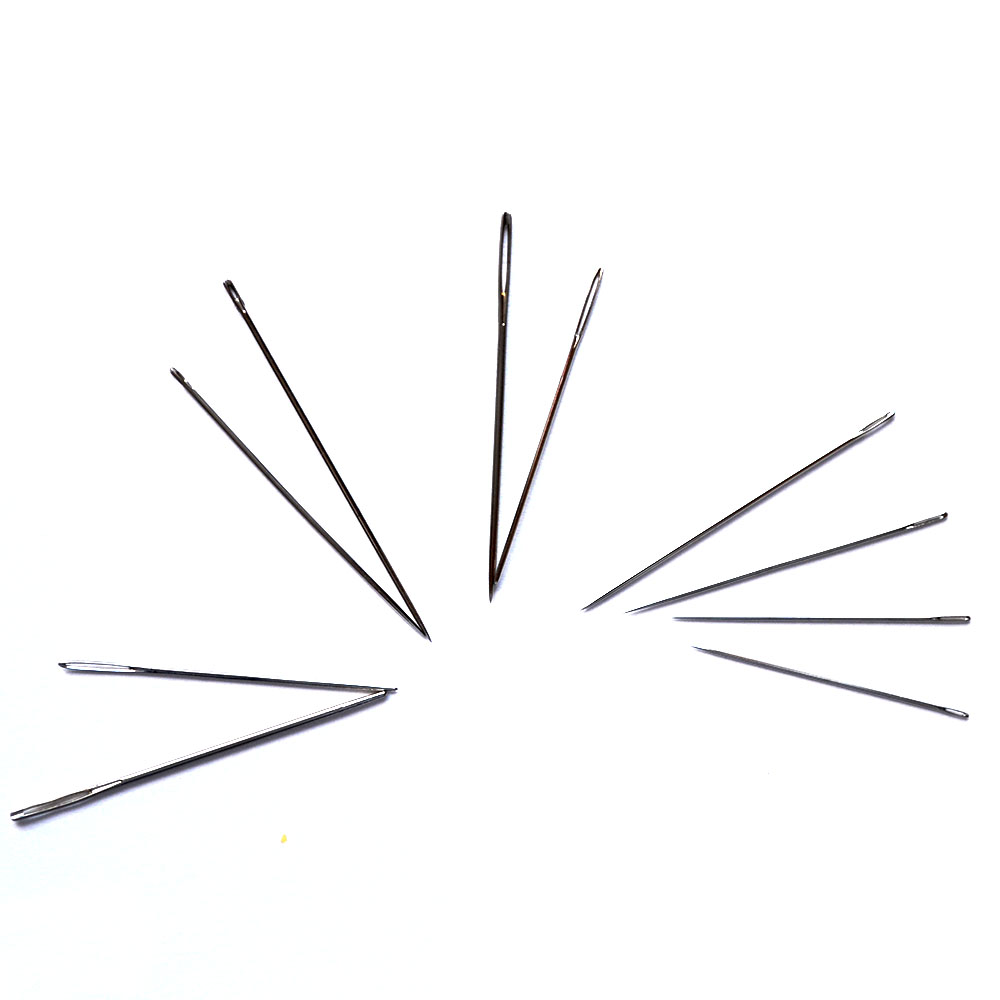
Bullion knot needles
If you stitched a bullion knot or french knot, you most certainly know how nerve-wracking it can be to pull the needle through the many wraps of thread around it. For this problem, there are special Bullion Knot needles or milliner needles that are slimmer, longer, and have a very narrow head. This makes it much easier to move the needle through the knots. For very long bullion knots, it is also very necessary to use a longer needle to fit all the wraps of thread on it.
This is especially useful for Brazilian and French embroidery, where lots of wrapped stitches like bullion knots are used regularly. I personally love to use milliner needles for everything, and always cry a bit inside when I have to use a big tapestry needle when working with wool and have to do a french knot with it. (I’m sure there are big-sized milliner needles, too)
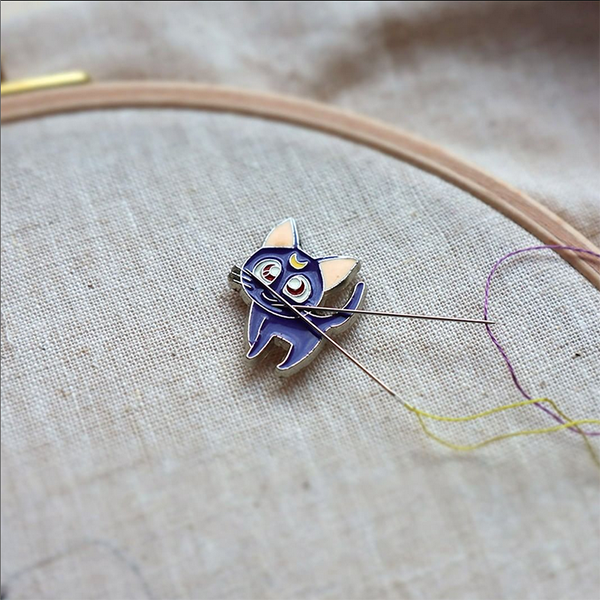
Needle minders
On the subject of needles, needle minders are a great way to organize your embroidery needles when working with multiple needles at once. Needle minders are little magnets, that you attach to the fabric. Because they are magnetic, the needles stay in place and you have a dedicated place for your needles other than your couch cushions (that’s dangerous, don’t do that!).
Needle minders come in various shapes and forms. I have a Sailor Moon needle minder that makes me very happy when I use it. Like enamel pins, the variety is enormous. Here is a list of favorite needle minders.
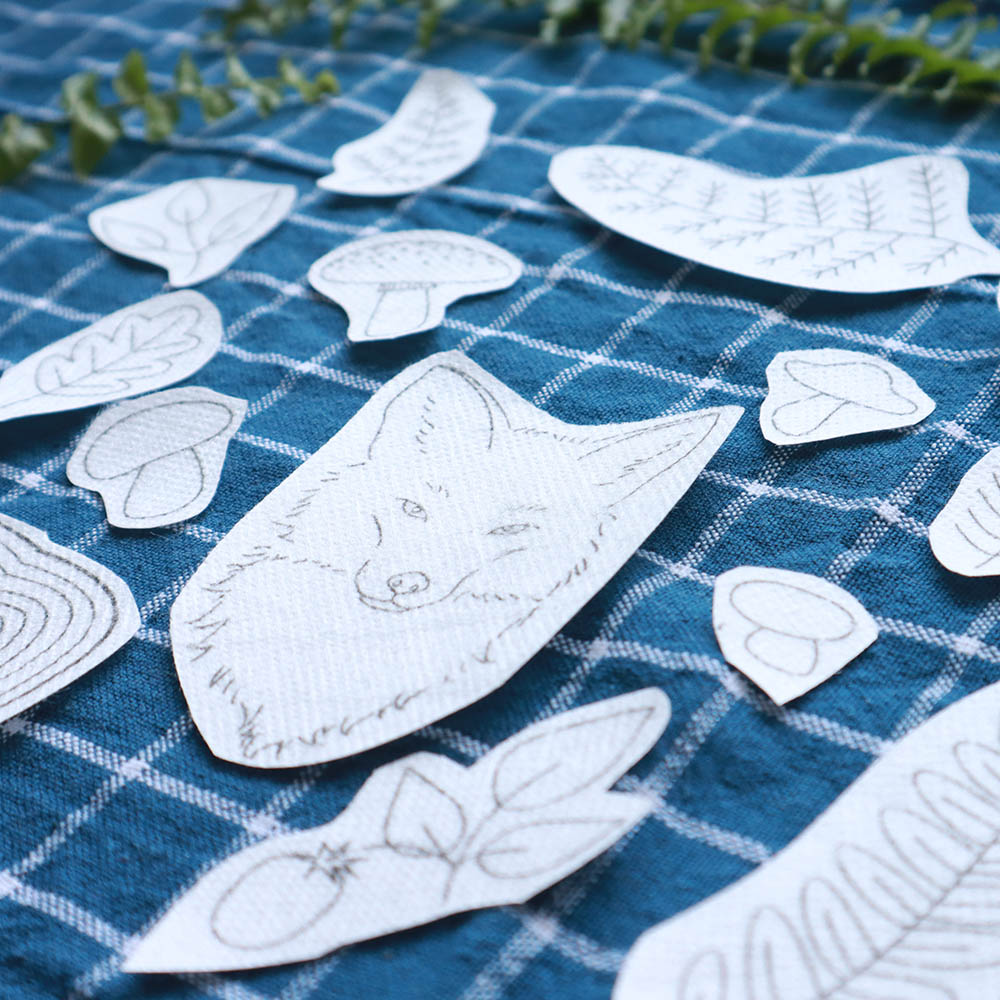
Stick and Stitch Embroidery Stickers
Stick and Stitch embroidery stickers are all the rage now. They are printed on a water-soluble stabilizer. You stick them onto the fabric, stitch over it and then wash it out with water. This works exceptionally well for dark fabrics and embroidery on clothing where you often can’t trace a pattern through. You can get the unprinted stabilizer, too, and trace the pattern by hand, then stick on your fabric.
Obviously, this only works for materials that you can wash. A big benefit aside from the quick pattern transfer is that it stabilizes the fabric you are working on. The stabilizer works great for stretchy fabrics like shirts or sweaters. I also had great results with corduroy and velvet. The stabilizer holds the little threads of the fabric in place and makes it much easier to stitch over it without the threads getting lost in the velvet.
There are lots of Stick and Stitch packs with themed motifs to stitch. I love them so much, I made my own collections of embroidery stickers.
Other helpers
There are many more embroidery helpers that make a stitcher’s life easier. Some honorable mentions:
A thimble is a must if you stitch a lot or work with thick materials all the time. It is a blessing for your fingers. There are thimble pads that you can stick on your finger if you don’t like the traditional leather or metal thimble.
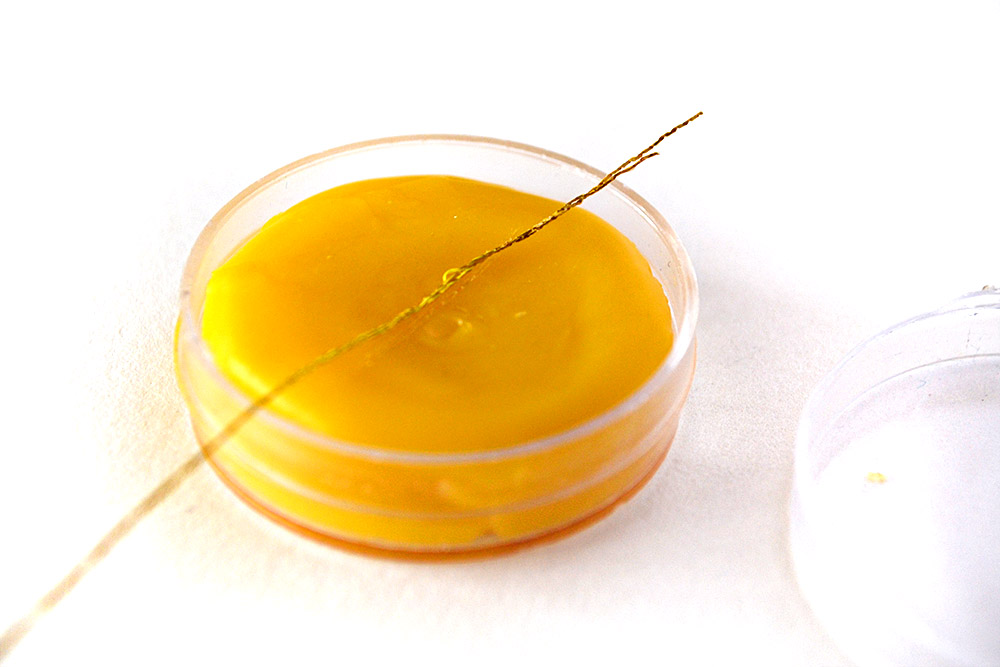
Thread conditioner is a lifesaver when working with frizzy threads like metallics. Pull the thread through the conditioner, and you’ll save yourself the hassle of entangling thread ends. I wrote about working with metallics and how to get this type of thread to behave in this article. I personally like the beeswax version the best because it is a sustainable option. Still, in some cases, a transparent conditioner might be a better option.
In my workshops, I often have some participants who have trouble threading the needle. If you have difficulties threading the needle, I highly recommend a needle threader. Yes, you can spit on your thread, yes, you can fold it to make the thread sturdier and easier to push through BUT things are still much easier with a needle threader.
Conclusion
These are my most used embroidery helpers. I can wholeheartedly say, that they have improved my embroidery experience. All of them are not 100% necessary so they are definitely not a must – more of a good to have kind of tools. If you love to stitch you might enjoy it even more with some of the tools mentioned in this article.
If you are looking for the essential tools for hand embroidery, especially for beginners, here is an article all about the essential embroidery tools you need.
Do you want more tips and tricks on hand embroidery?
Join the Tutorial Alert! It is a biweekly newsletter that contains information about new tutorials & articles on Pumora, tips & tricks, and promotional content like new embroidery patterns or special discount codes.
You’ll receive an email to confirm your subscription to the Newsletter. Please also check your Spam folder and mark the email as no Spam.