
Let’s start off the 7 days of stitches series with the BLANKET STITCH. This embroidery stitch is often used for hemming blanket edges. Maybe you have/had a baby blanket that was hemmed this way, too?
How to embroider the blanket stitch
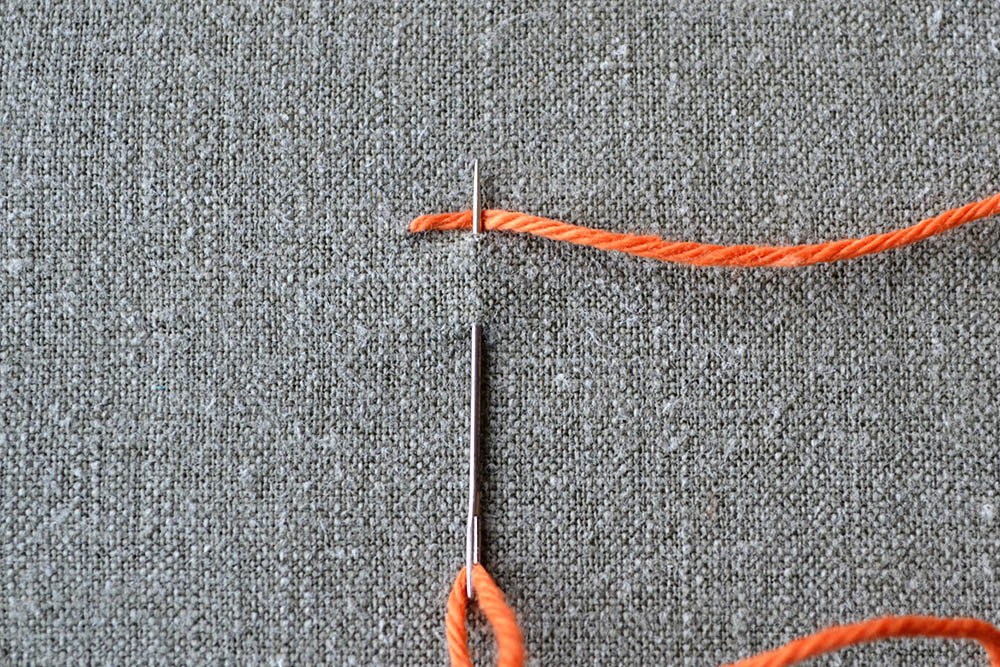
1// Imagine two parallel lines. Then think of each stitch as a rectangle. Start in the top left corner, stick the needle in the bottom right corner and pull the needle up in the top right corner of this imaginative rectangle. Make sure the thread is laying under the needle tip before you pull out the needle.

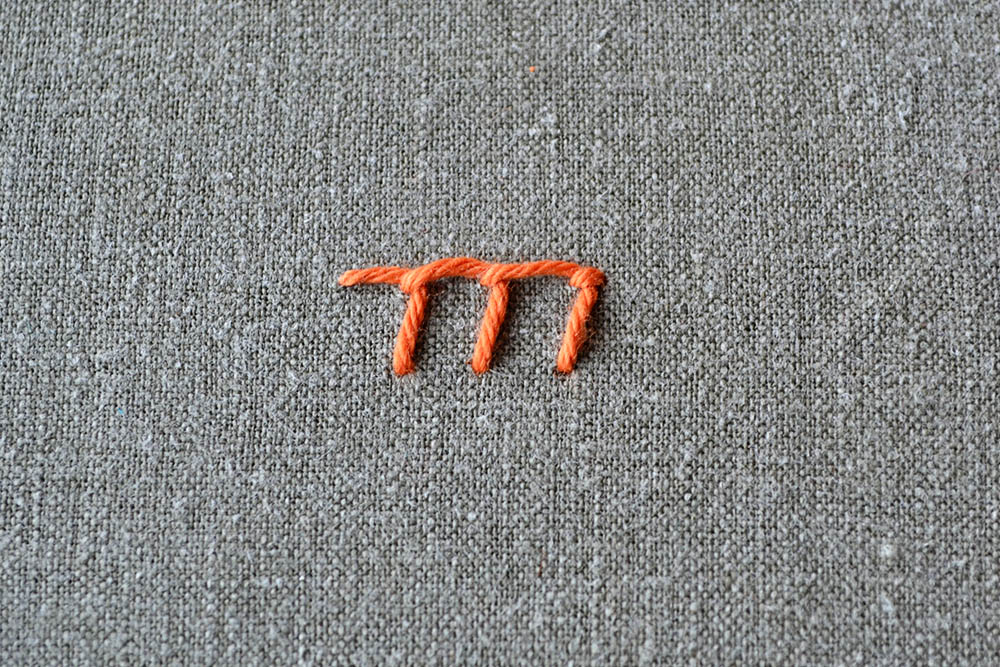
2// Repeat the first step until you have the desired amount of stitches.

3// To finish the blanket stitch, stick the needle in the top right corner of your stitch rectangle to secure the last loop of the stitch.
The blanket stitch plays a traditional role in edging and securing hems. However, it can be used for many other purposes, too. If you set the stitches very closely it is possible to cover the entire fabric underneath the stitches.
Do you want more tips and tricks on hand embroidery?
Join the Tutorial Alert! It is a biweekly newsletter that contains information about new tutorials & articles on Pumora, tips & tricks, and promotional content like new embroidery patterns or special discount codes.
You’ll receive an email to confirm your subscription to the Newsletter. Please also check your Spam folder and mark the email as no Spam.