In this ultimate guide to hand embroidery on clothes, you’ll get all your questions answered and more. Over the many years of doing embroidery, clothes have been challenging and the most rewarding projects at the same time. So let’s dive deep into the matter and get stitching!
Disclaimer: This article contains affiliate links.
What do you need for embroidery on clothes?
You need a needle and thread. The fabric comes with the garment, so that is one thing less to worry about. Depending on the material and type of garment, it might help to use some sort of stabilizer.
Embroidery threads for clothes
I always recommend using the same materials as the garment itself. That has one very big reason that doesn’t apply to purely decorative embroidery projects: clothes need to be washed regularly.
If you have a cotton shirt, and you embroider it with silk or wool, you can’t wash it like a cotton shirt anymore. Wool would simply felt and pull together the cotton fabric underneath if you wash it in the washing machine like your regular clothes. Don’t get me started on how well silk and hot water work together – spoiler alert: it doesn’t end well. Trust me, I made all of these mistakes myself, and it is very heart-breaking to see your embroidery ruining your favorite shirt.
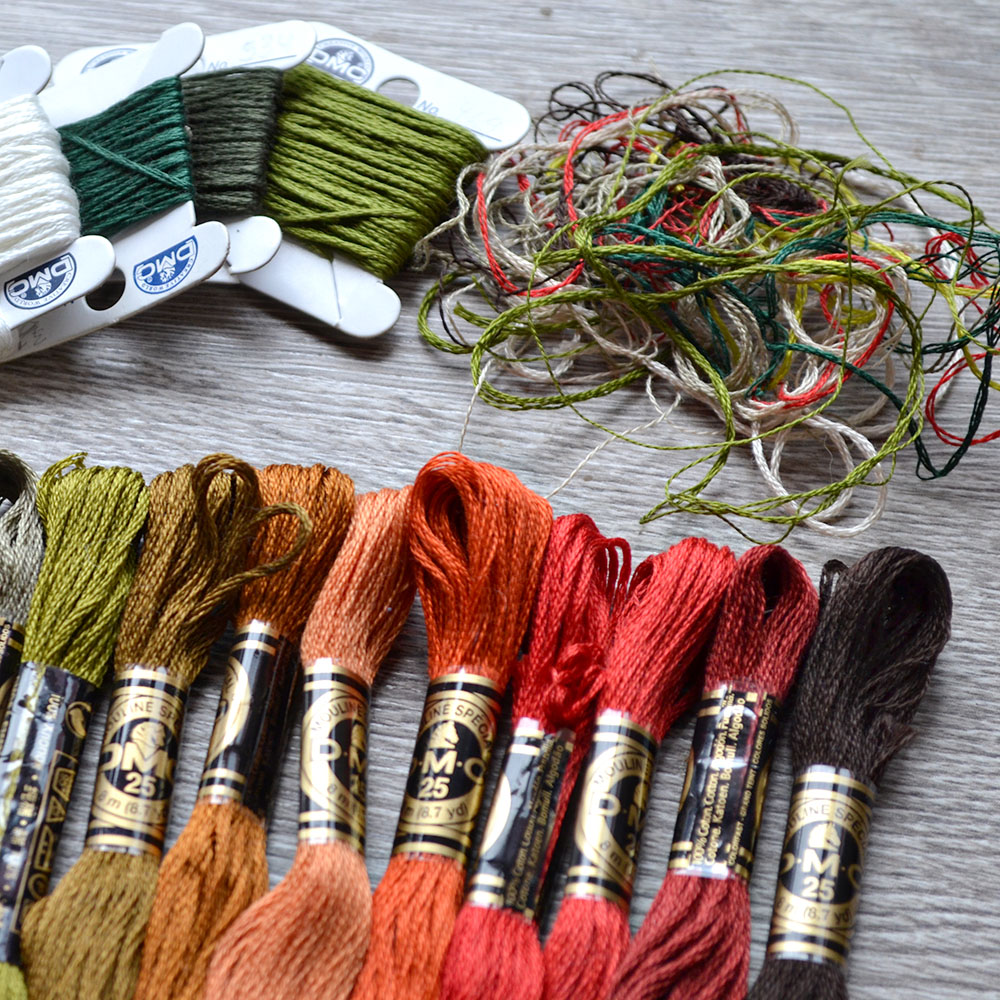
So if you have a cotton shirt, use cotton embroidery thread or linen. Linen and cotton behave similarly in the washer, so you can use them interchangeably. If you have a woolen sweater that is handwash only, you can use woolen threads, even knitting yarn. Silks should always be washed gently and with cold water, so only use them for garments that you would wash this way.
This of course only applies to garments that will be worn. If you want to do a showpiece or costume that will only be worn once for a photo shoot, you have a lot more freedom with the choice of materials.
Do you need an embroidery hoop?
For embroidery on clothes, you don’t necessarily need an embroidery hoop. The purpose of an embroidery hoop is to hold the tension of the fabric during the stitching process. With each stitch, the threads pull the fabric together. That is why for many fabrics it is easier to stitch on with an embroidery hoop.
Thin and regular fabrics need an embroidery hoop to hold the tension. Firmer fabrics like denim are easy to embroider without a hoop because they hold the tension of the threads well.
For embroidering clothes, however, using an embroidery hoop is not always possible. Seams, buttons, and pockets can get in the way of the hoop, making it harder to hold the tension. Sometimes an embroidery hoop can’t fit into the space you want to stitch on. Pockets can also get in the way and if you want to stitch on a pocket it can be difficult to fit your hands, needle, and the hoop in one small spot.
There are very small embroidery hoops like these that are wonderful for stitching on clothes.
Also, there are fabrics which you should not use a hoop for. Velvet, corduroy, and even leather can get permanent damage from the two hoops pressing the material together for a long time. So avoid using hoops for this type of fabric, or if you must use it do so with less tension than you would usually do to avoid pressure marks.
How to transfer embroidery patterns on clothes?
Now that we have the materials and tools sorted out, how do you actually get the pattern on the fabric? You can use any transfer method that you would use for regular embroidery projects. If you want to learn more about this, I highly recommend this article, where I wrote about several transfer methods. It would be way too long to write about all methods in this context, but here are my two favorite methods for clothes.
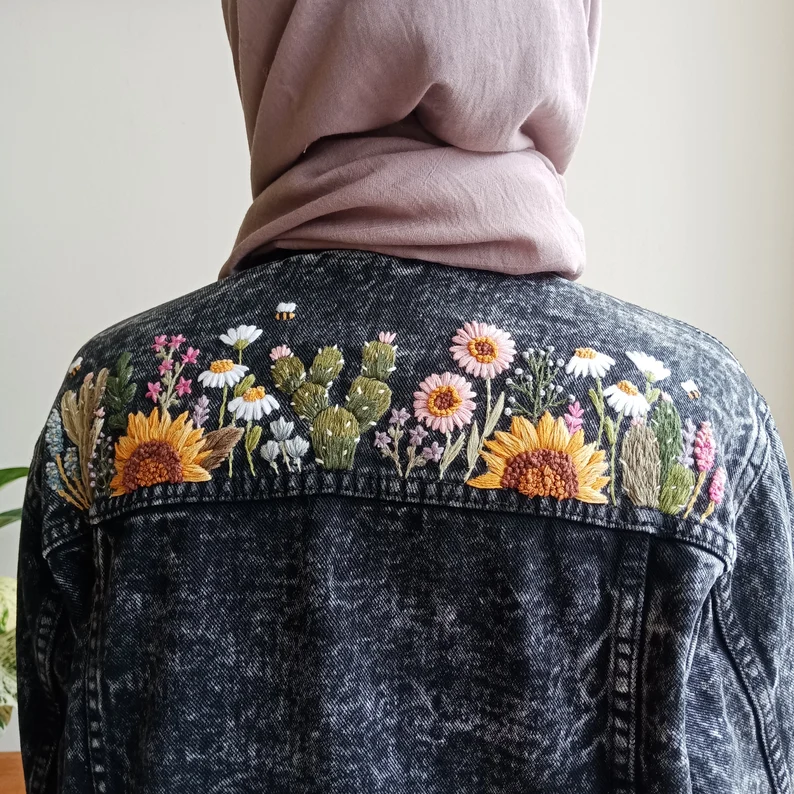
Flower embroidery kit for a denim jacket
Denim is a very thick fabric and is almost impossible to trace through. This pattern by Puteto is transferred using water-soluble sticker paper (read more about that in the text below). This flower pattern is available as a PDF or with a preprinted sticker to wash off later.
Chalk & other pens for pattern transfer
If you want to go freestyle and draw on the fabric directly, I recommend a tailor’s chalk pen. They are available in various thicknesses and colors (white and blue most of the time). Chalk pens don’t stain the fabric and rub/wash away over time. Since there is no chemical reaction going on, the marks will not come back after time as other pens can.
Water and air-erasable pens are very practical, but the lines can come back over time. I have not experienced this yet but heard about it. Heat-erasable pens like this are very practical. If you want to use the garment outside, be aware that the lines come back when exposed to the cold. Like freezing-water-cold, not just a bit chilly. You can avoid that by washing the fabric first and then ironing over the lines after that. This removes the gel of the pen better and the lines never come back. I tested it in my freezer, and it works much better!
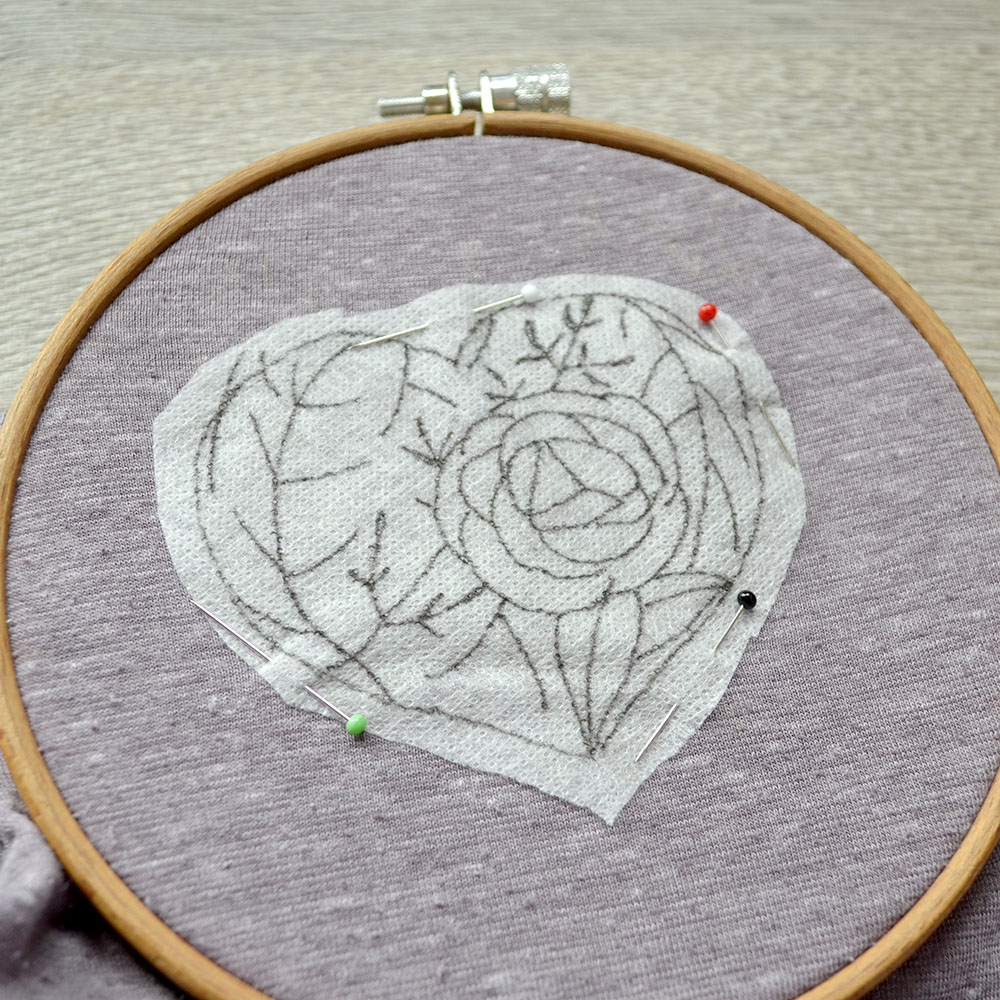
Water-soluble stabilizer
Stabilizers are a must in machine embroidery, but not so often used in hand embroidery. There is one type of stabilizer that has been a game-changer in hand embroidery recently: the sticky water-soluble stabilizer also called Stick and Stitch. You can print it, stick it on your fabric, stitch over it and then wash it out. It is a brilliant concept! I personally now use my embroidery stickers to stitch garments because it is such a neat process and I don’t have to worry about how to get the lines from paper to fabric.
There are many indie shops on Etsy that sell Stick and Stitch Stickers with preprinted motives. If you want to check them out, here are my embroidery stickers and a list of other sticker sellers.
The easiest method to embroider any garment: Patches
Sometimes it is easier to not embroider directly on the garment, but to make some kind of patch. This is especially useful for garments made out of velvet or other fabrics that are not easily embroidered. Aside from that, a patch can be removed and stitched on another garment later, which is particularly convenient for children’s clothing. Kids grow out of their clothes faster, and it is really nice to reuse the embroidery on a new piece of clothing.
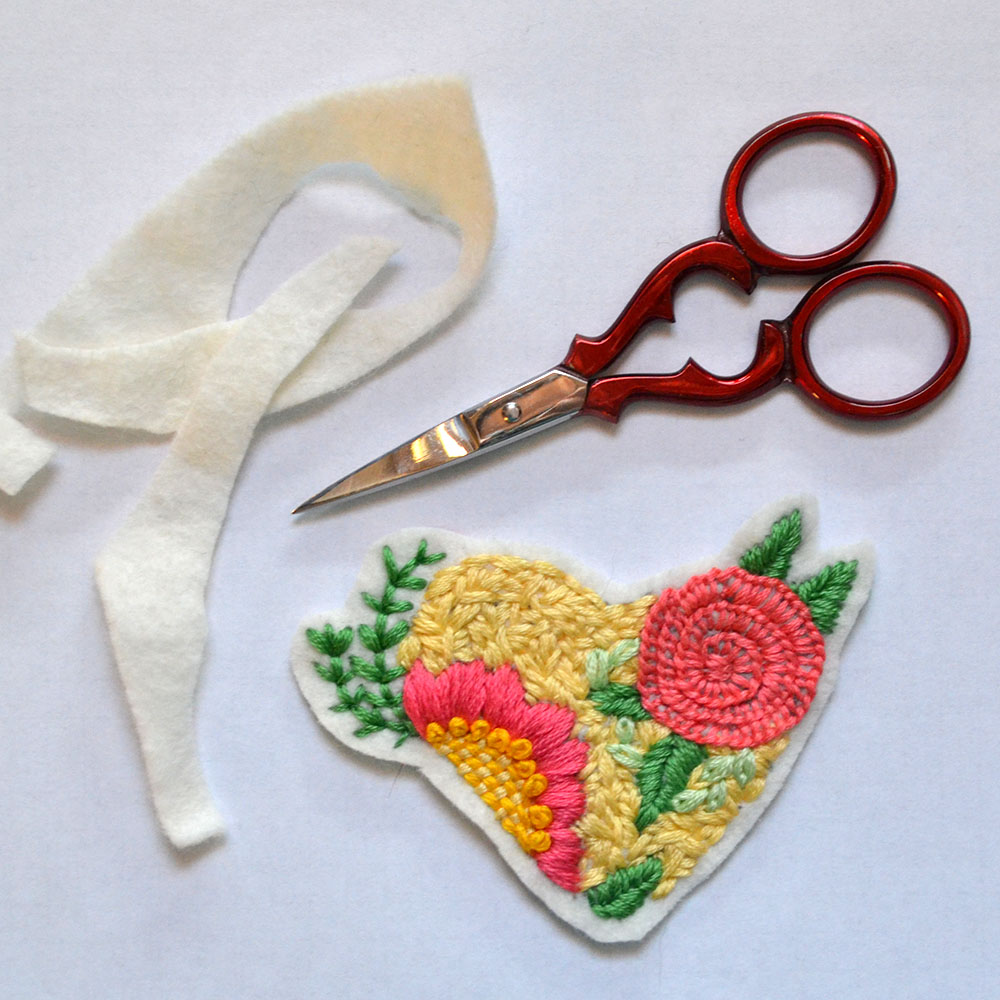
To make a patch, embroider your motif on a thin piece of cotton fabric or felt. Then, cut out the shape leaving a bit of room around the embroidery, so you don’t cut into the threads. Felt works great because the edges don’t fray like with fabrics. There are iron-on stabilizers that you can use to avoid fraying of the fabric.
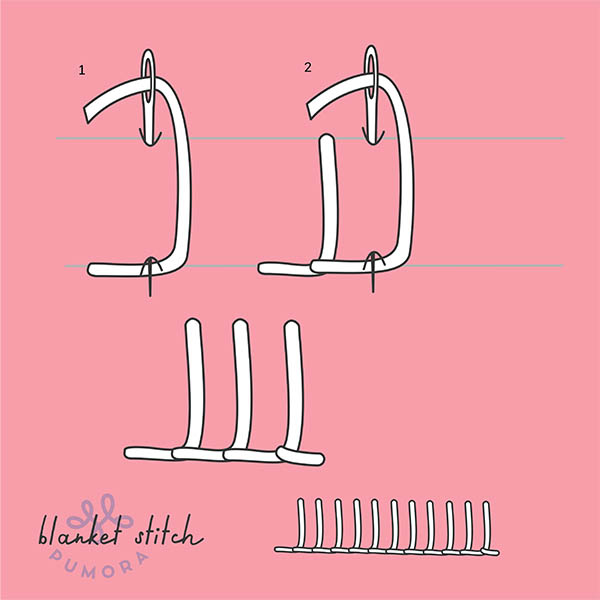
Then, stitch the patch on with close blanket stitches. Felt can be stitched on with space between the stitches. For fabrics, I recommend embroidering the stitches very close to each other so that the fabric of the patch is covered. For large patches, it might be necessary to add some stitches in the middle of the patch to avoid wobbly embroidery. Use lines or areas in the embroidery itself to do that invisibly.
General tips for embroidery on clothes
I’ll go into more detail for specific garment types further down in this article, but here are my top tips on embroidering clothes.
1. Use shorter embroidery stitches than you would normally do.
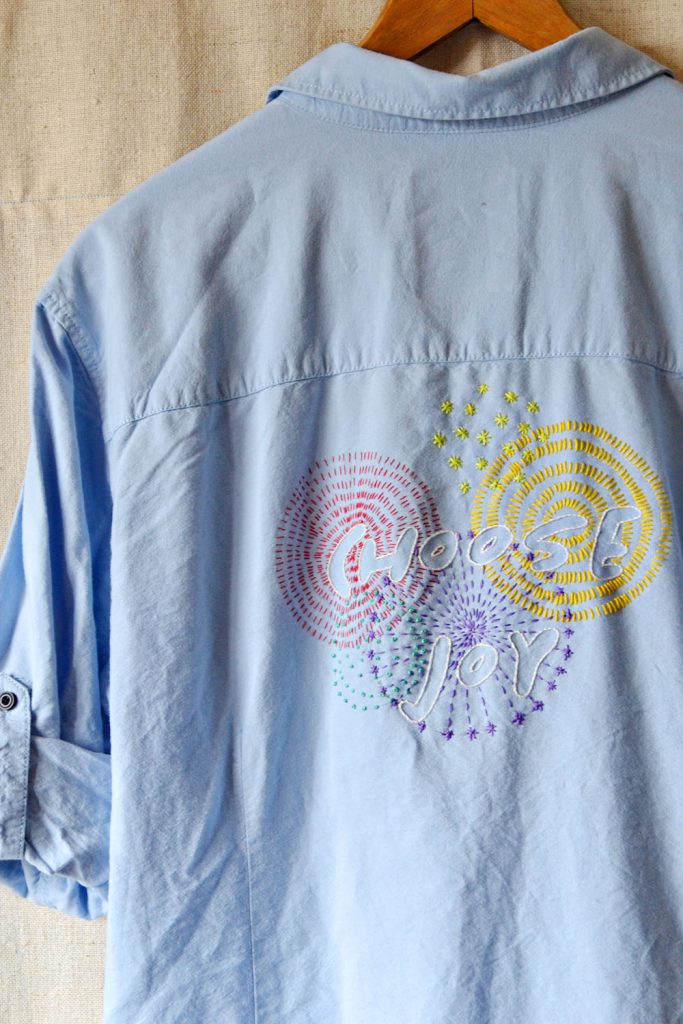
This reduces the chance of something getting caught in the thread and breaking it. I have a shirt that I used very thin and long stitches on. These are the only ones that didn’t pass the test of time and many washing cycles.
The red threads on the blue shirt here have sadly started to loosen at some points. I only used one single thread of embroidery floss, and that was just too fragile for being placed on the back. The back does get quite a bit of abrasion because of jackets, vests, or leaning on to things.
2. Use stitches that are durable.
Not all stitches are the same. Some are much more prone to breaking than others. Tried and tested embroidery stitches are:
Satin stitch is a beloved stitch for filling areas, but if used on a garment, use it for small areas only. If you have to fill a bigger area, divide it into smaller areas and fill them separately. Alternatively, you can use Romanian couching or brick stitch to achieve a similar look without the very long threads created with satin stitch. Here is a list of fill stitches that work like a charm for embroidering clothes, too.
3. Use a thimble for thick fabrics.
I can’t tell you how much pain I got from stitching a thick denim jacket for my book. And I say that as a person who regularly works on our building site and gets splinters and stuff in her fingers all the time. Pulling a needle through thick fabrics can hurt your fingers. A thimble helps you push the needle through from the back. To pull the needle through completely, use tweezers or needle puller thimbles. There are many options other than using the traditional metal thimble that are softer and easier to get used to.
What to embroider on clothes?
There are many ways to embroider clothes. Here is some inspiration with tips on how to achieve the look:
Decorative borders and seams
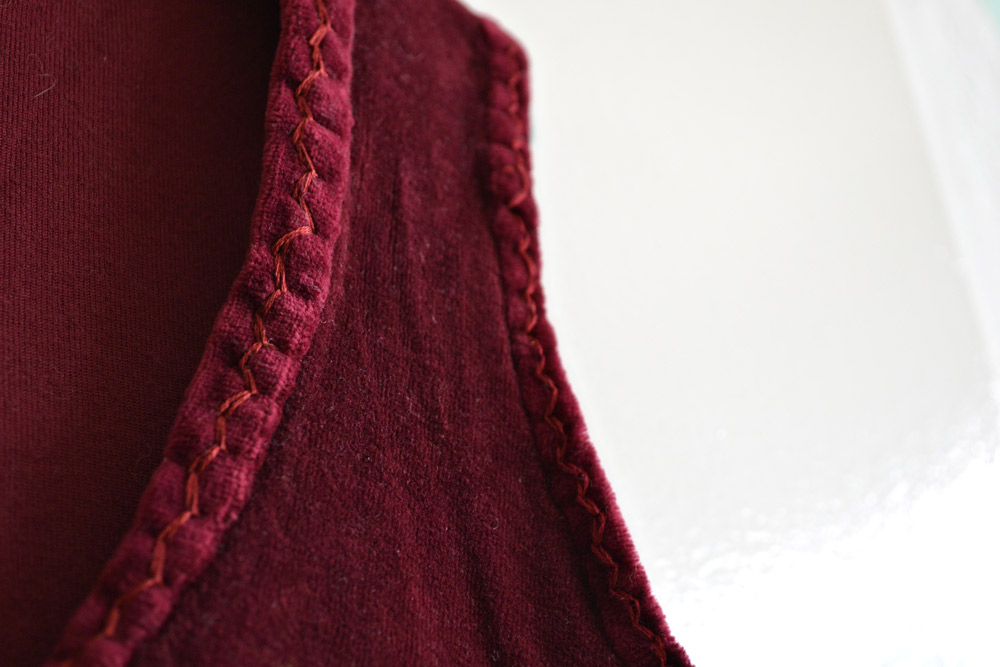
One of the easiest ways to embroider a garment is to embellish the seams or hems. I love to add some chain stitch variations to hems at the sleeves or bottom. Here are lots of chain stitches to choose from. Other stitches like herringbone stitch also work great for this. Adding blanket stitches around the bottom of a hem also makes the hem sturdier.
Following the pattern
For embroidery purposes, we often skip the patterned fabrics. The thing is that clothes often come with patterns or distinct textures that make it hard for embroidery to stand out. It is much easier to follow the pattern and use it as a guide for embroidery. This way you can also skip the entire pattern transfer because the pattern is already there!
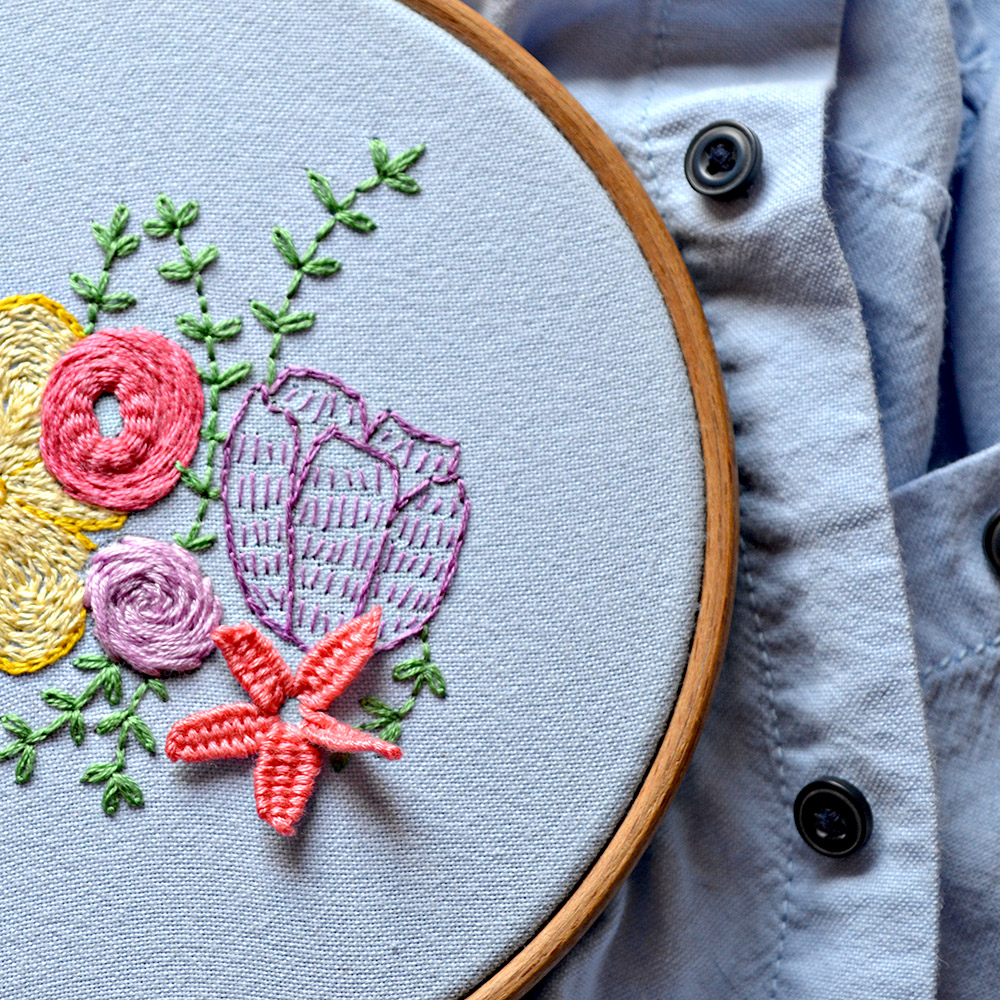
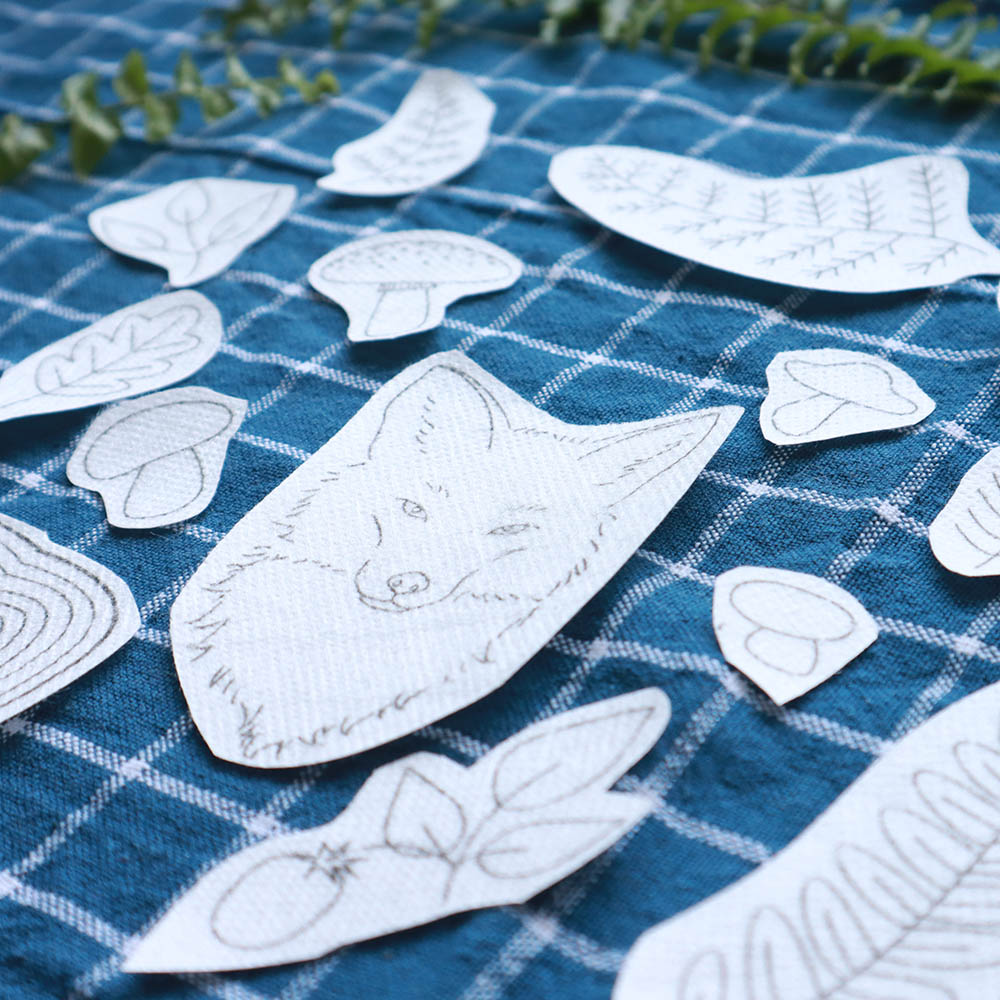
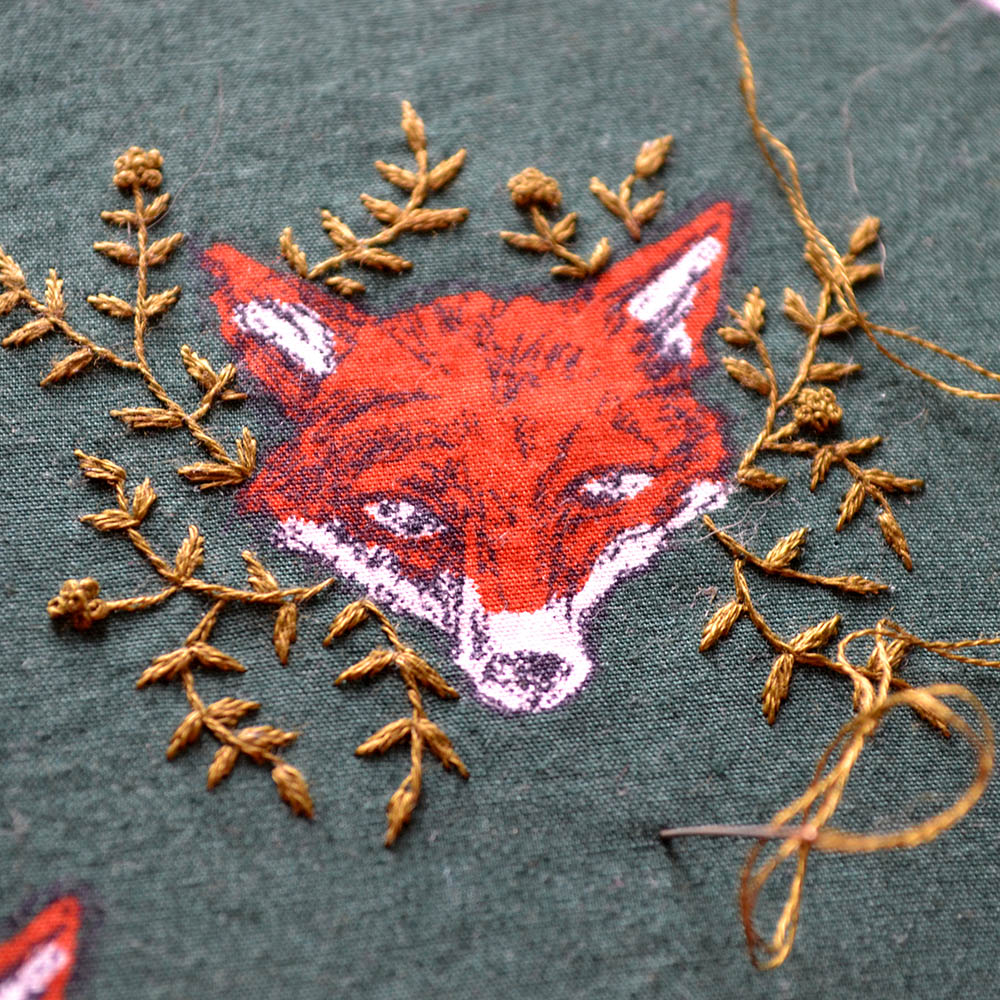
One way of doing this is adding stitches organically around a printed motif. Florals or geometric shapes work great for this. In the first picture with the fox, you can see an example of that. I stitched some flower stems with leaves around one of the foxes printed on a dress. You don’t have to do all of them. Choose a place that you are comfortable with, like at the top of the sleeve or on the chest.
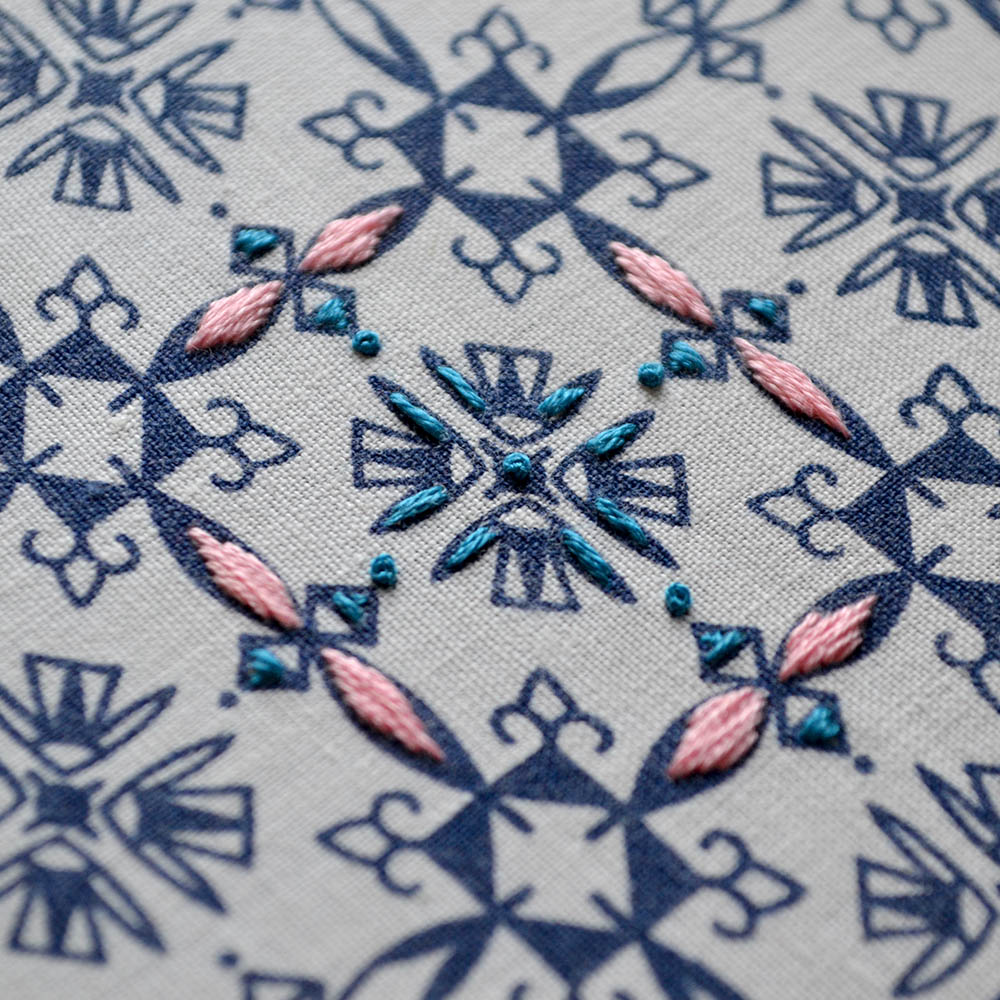
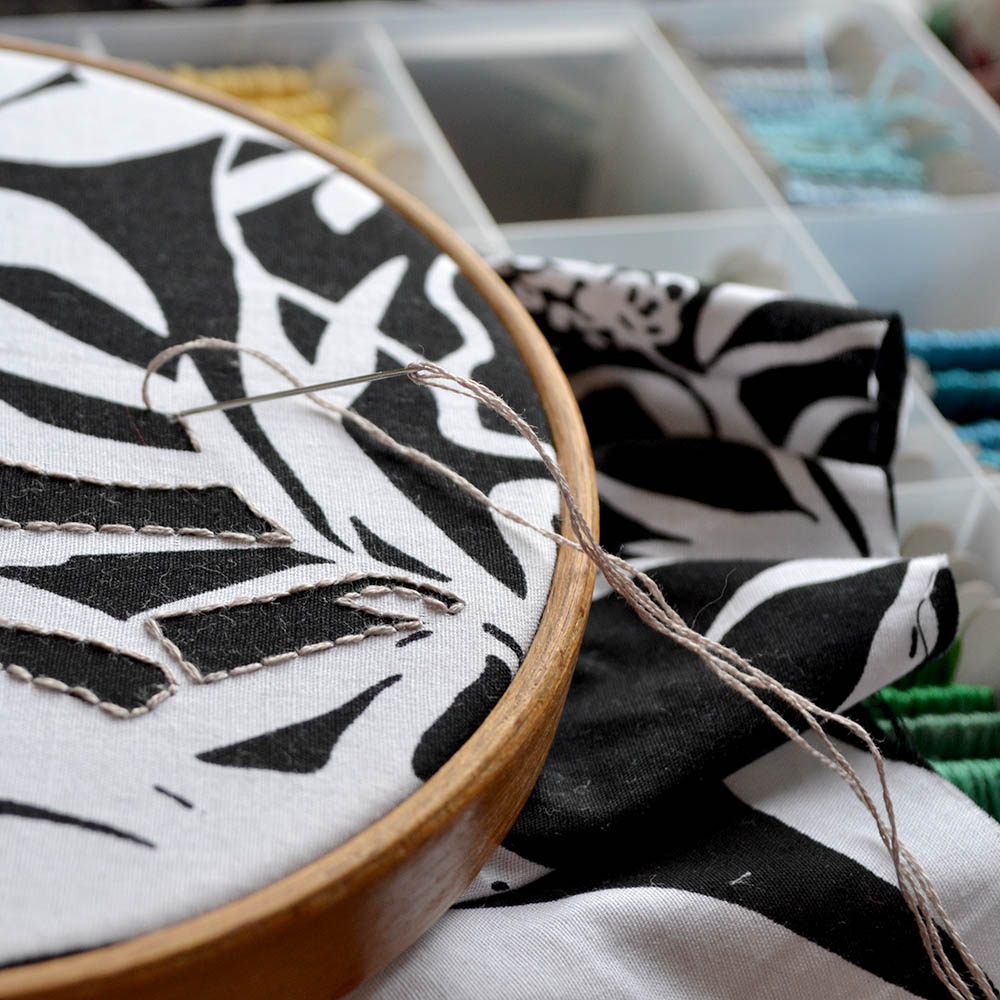
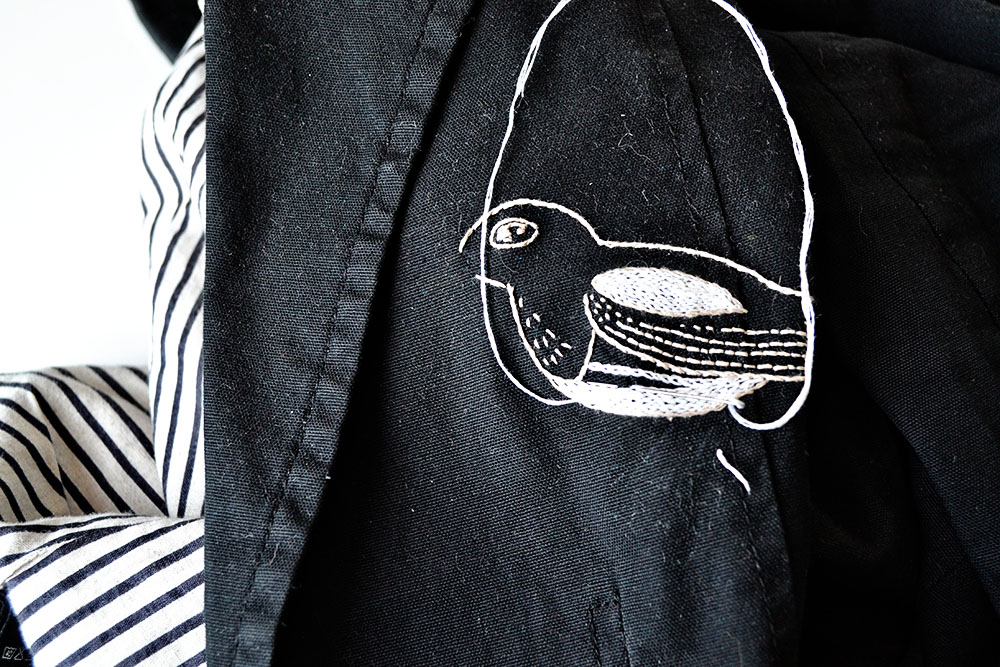
I like to use outlines and shapes of printed fabrics to work along with satin stitches, chain stitches, or basic back stitches. This emphasizes the pattern and gives it more depth (pictures 2 & 3). Use a contrasting color or a color already in the fabric – it’s up to you!
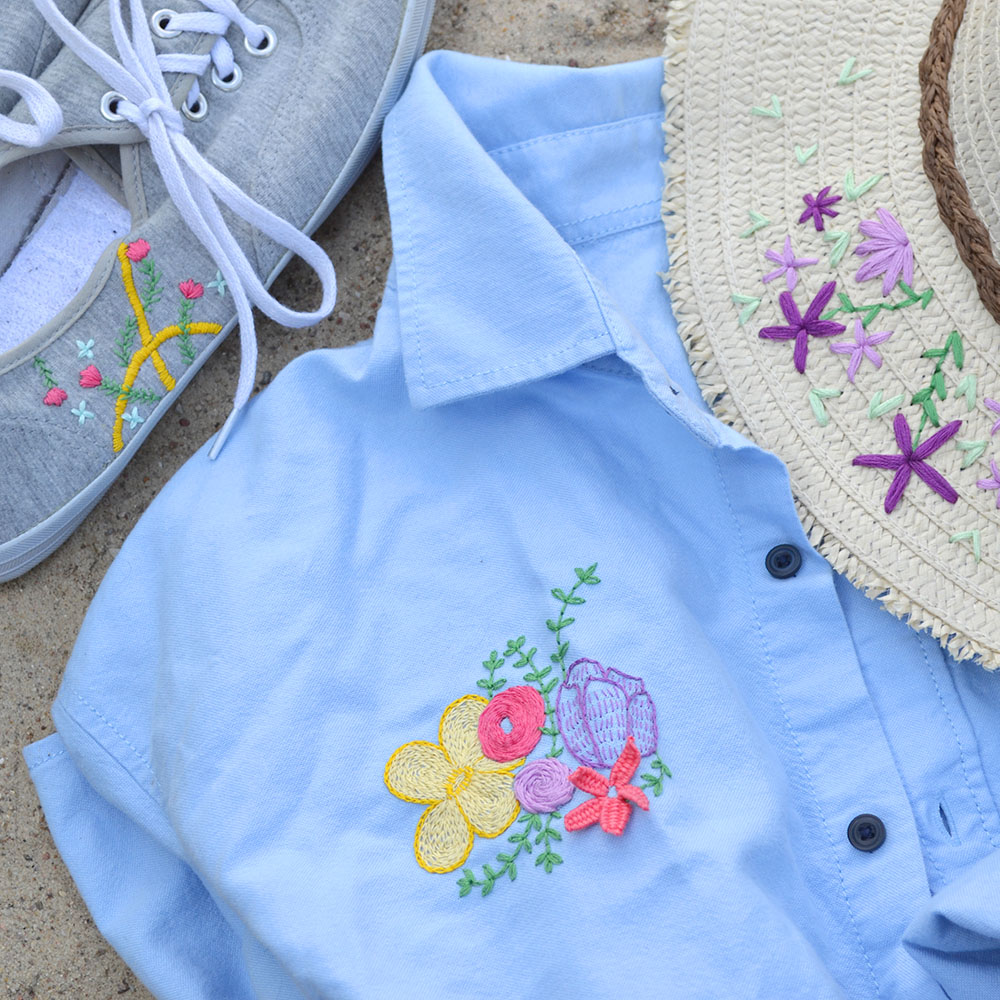
Big motifs
Then, there are the big statement patterns that you might want to use. A classic is the embroidery worked on the back. Jackets and blouses are perfect for this. It is quite a feat to embroider big projects like this but it is so worth the time.
If you want to embroider a denim jacket, make sure you have a thimble. Denim is really thick, and it is hard on the hands to stitch through them. I had to do my jacket in phases because my hands couldn’t take it anymore if I stitched on it for too long at once.
Good places for bigger motifs are on the side of the fronts, the top of the sleeve cap, motifs flowing down from the shoulder seam, and the upper back.
How to hand embroider a shirt
Shirts are made of cotton jerseys most of the time. Jersey is an elastic and nowadays often thin material that can be challenging to work with. The most important thing to remember is: Jerseys are knitted fabrics. If you break one thread, the hole will be visible quickly. As a cat person, I know how fast a tiny claw can make a hole in a shirt. A needle or thread that is too big can cause the same damage.
To avoid making holes while stitching, use a narrow needle and a thread thickness that is easy to pull through. If you have trouble pulling the needle through the fabric, it might be too thick for the fabric. I like to use 2-3 strands of embroidery floss for shirts. If you want to be extra safe, use a needle with a blunt tip.
I like to use embroidery stickers on the front or an iron-on stabilizer in the back to stabilize the fabric. This way, it becomes less elastic during the stitching process and can be washed away. It is not necessary to have a stabilizer permanently at the back of the fabric. Threads are pretty durable and will not rub away that quickly.
If you want to use an embroidery hoop, make sure that you don’t overdo it with the tension. The fabric will shrink to its normal size again when you take it out of the hoop. The threads of each stitch don’t shrink, however, which can cause the embroidery to become less neat and even wobbly.
How to do embroidery on knitting
Knitwear is trickier to embroider on. The structure is completely different, especially when it comes to thicker hand knits. You can use the knitted structure to your advantage though by following the lines and stitches for your embroidery.
Since knitted items are stretchier than regular embroidery fabric, the stitches you use should also be a bit stretchy. Some stitches work better than others. Here are my favorite stitches for knitted items:
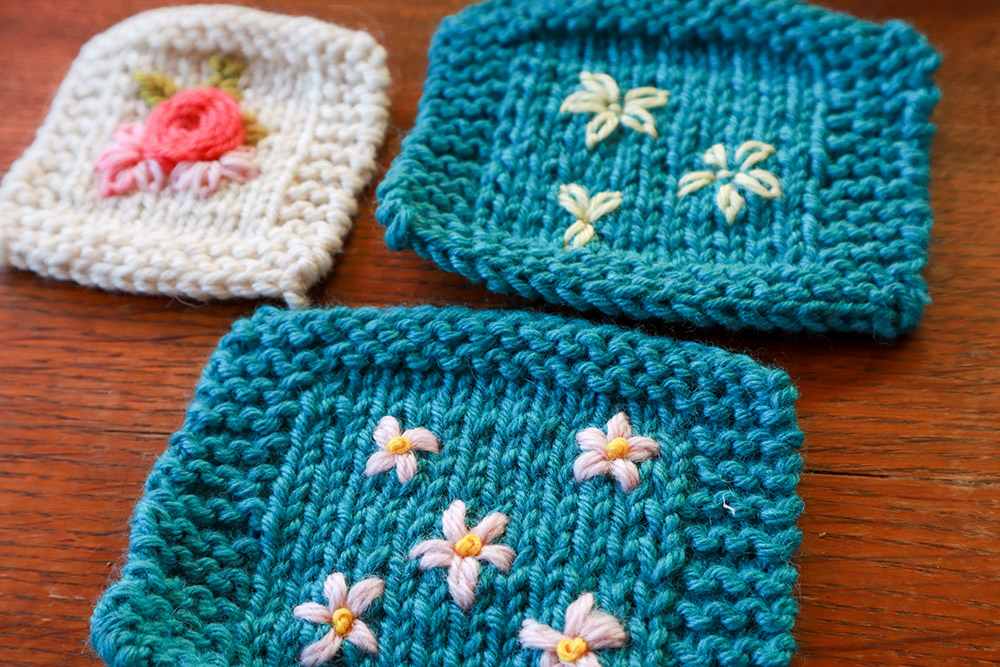
1. Chain stitch & other looped stitches
Chain stitches and most of the other looped stitch families (blanket stitch, feather stitch, fly stitch) are very flexible and can stretch quite a bit. Chain stitches also look like knitted stitches. If worked in lines, they look like knitted cables. I have used chain stitches to make one side of a cable another color. This way I could knit my sweater in one color and add details in another color later with embroidery. In the form of a lazy daisy, chain stitches are amazing for flower embroidery on clothes!
2. Cross stitch
When working with a regular pattern like plain stockinette stitches or seed stitches, cross stitch patterns can be applied inside the grid of the knitted stitches. Heart shapes and other cute little patterns are perfect for this. You can also make a border with cross stitch around the hem.
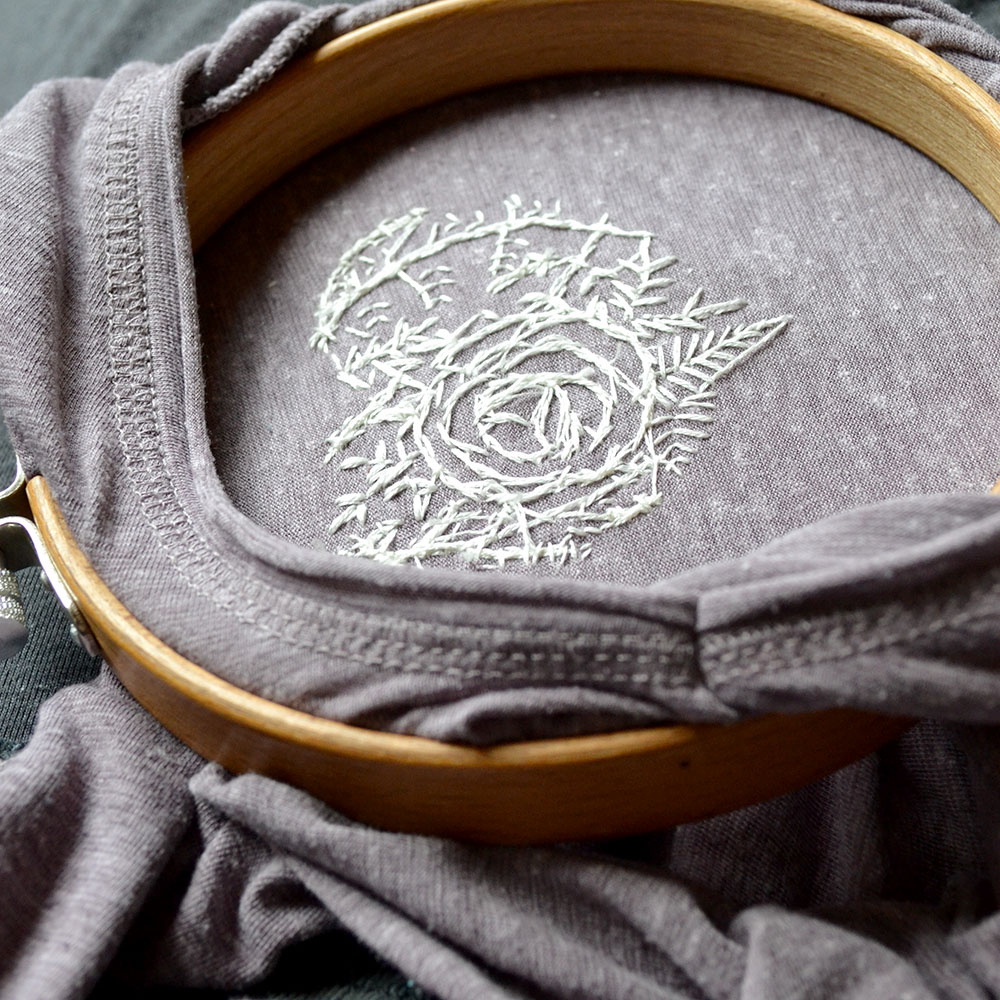
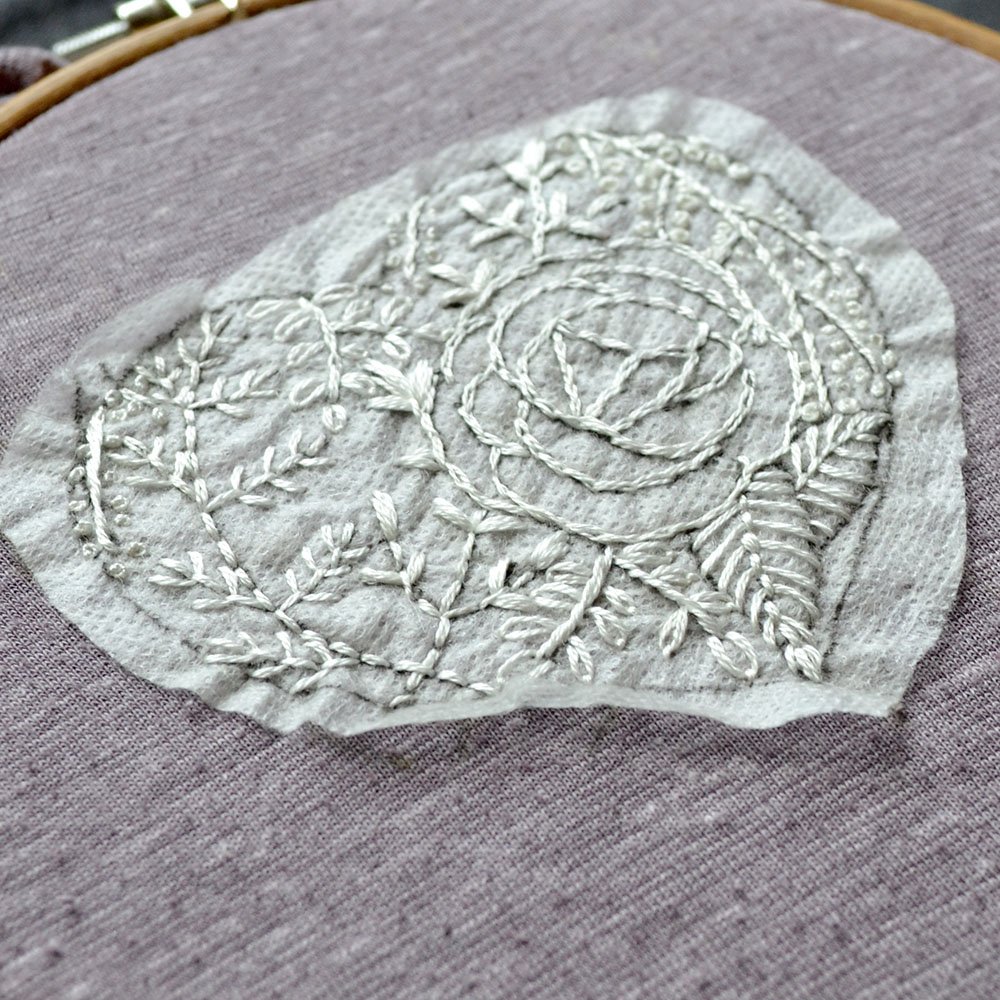
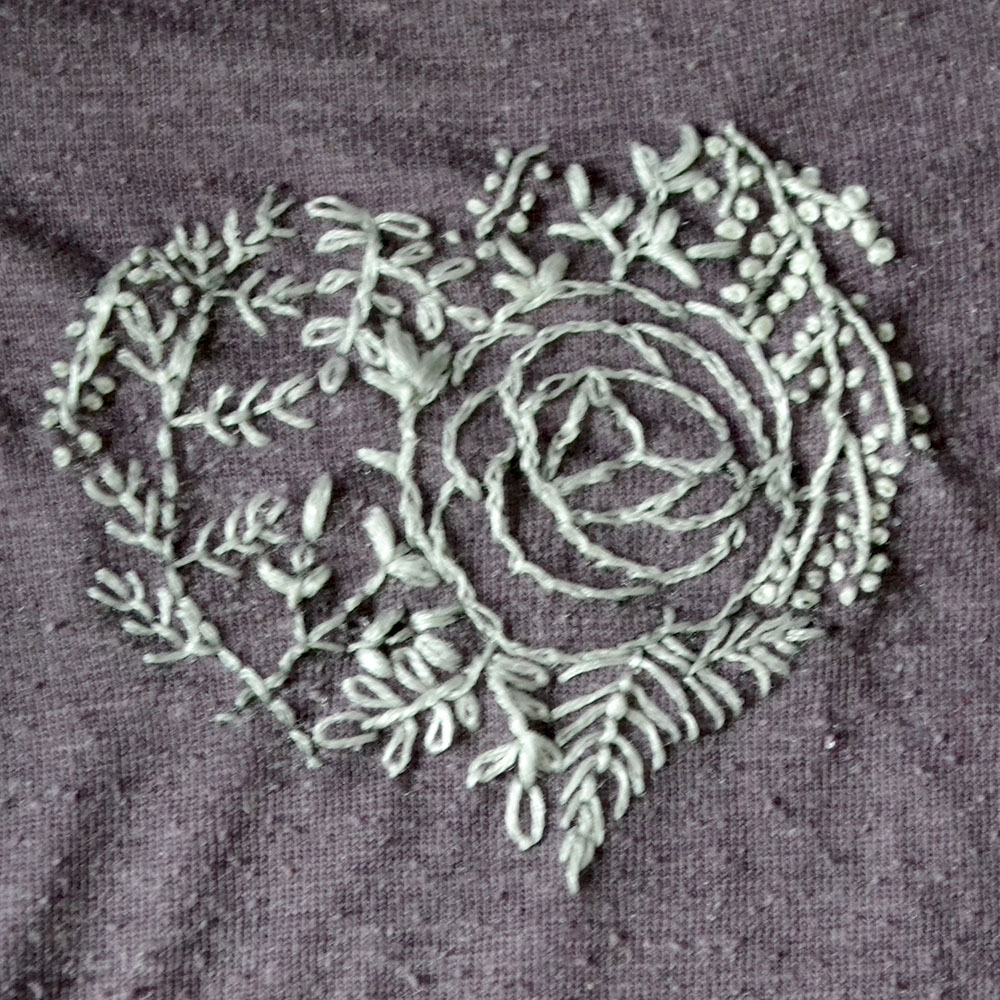
3. Weave stitches
The woven rose is also a perfect stitch for knitted garments. The base stitches are the only stitches that need to be placed on the knitted structure. The main thread is woven around these base stitches and only goes into the knitted threads at the end and the beginning. Consequently, the woven rose doesn’t disturb the knitting too much as other stitches do.
If you want to learn more about embroidery on knitting, I share lots of tips and tricks in this video.

By loading the video, you agree to YouTube's privacy policy.
Learn more
Frequently asked questions
Can embroidery be washed?
Yes, cotton and linen threads can be washed with regular clothes. Make sure to turn the garment inside out to protect the embroidery and iron only from the back. Iron the embroidery with a soft towel underneath to avoid pressing the stitches flat.
Other materials like sequins, metallic threads, silk, and wool have to be treated with more care and should be hand-washed or not washed at all.
Can I embroider things for outdoor use?
Yes, embroidery can withstand a lot of wear if you use reasonable stitch lengths and durable stitches. Delicate wrapped and looped stitches can break more easily. The basic embroidery stitches however are good to go: back, chain, stem, and short satin stitches. Use more durable materials where needed, like pearl cotton instead of embroidery floss, and try to avoid delicate stitching in places that will get more wear.
Do I need a stabilizer?
In most cases, you don’t need a stabilizer. Stabilizers are rather meant for machine embroidery because the fabric gets pierced so often in the same place. With hand embroidery, this is not the case, so you don’t really need it. The type of stabilizer that I do recommend is the wash-away-type that you stick or iron on. It is perfect to transfer patterns and stabilize fragile or elastic fabrics for the period of stitching.
Do you want more tips and tricks on hand embroidery?
Join the Tutorial Alert! It is a biweekly newsletter that contains information about new tutorials & articles on Pumora, tips & tricks, and promotional content like new embroidery patterns or special discount codes.
You’ll receive an email to confirm your subscription to the Newsletter. Please also check your Spam folder and mark the email as no Spam.
