When I think of Game of Thrones, I think of the amazing embroidery on the costumes and the hairstyles (ok, and blood, let’s face it). Now, what if we could combine embroidery with awesome hairstyles?
With hair embroidery, you can basically reproduce any hairstyle you can imagine. Especially braids are so much more fun when the subject is not moving around like with styling real people.
How to embroider hair Khaleesi style
For the pretty curls, the easiest way to achieve the white waves is to use knitting yarn. In this tutorial, I used wool thread in DK weight. You can use multiple yarns for this. The important thing is, that it should consist of more than one strand – just like embroidery floss. Or you use a very thin yarn that you can combine to one bigger thread.
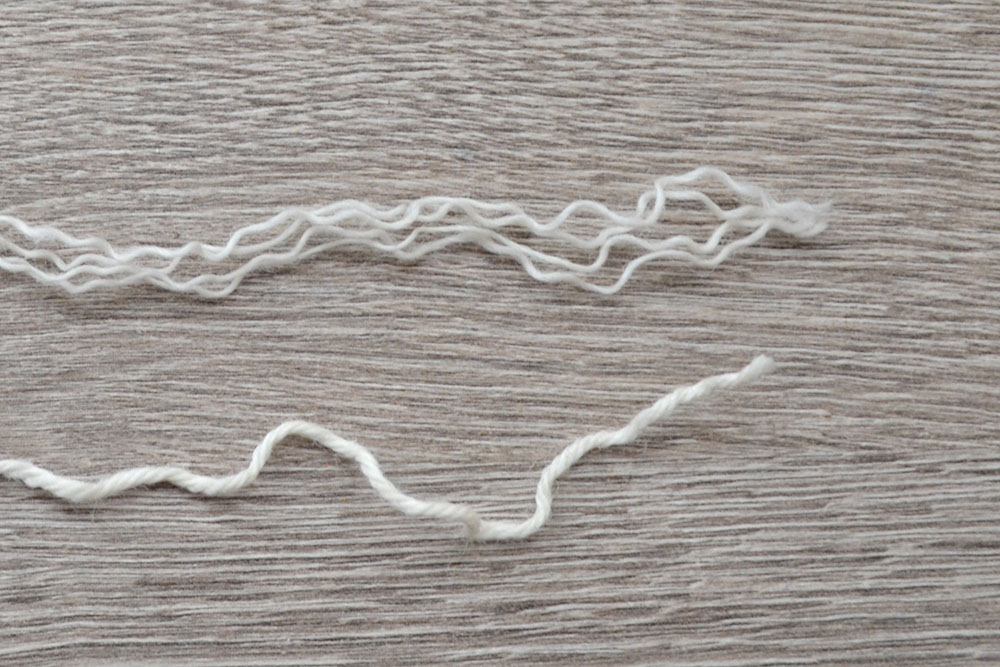
1. step – separate the threads
Cut your threads to about 12 inches/30cm lengths. Then, slowly pull out single threads. Just like with embroidery floss, it is important not to twist the thread, but to pull it out in line with the thick thread. Because knitting yarn is not designed to be separated, some fibers might break easily when you do this. In this case, you could make the thread shorter to avoid too much stress on the single strand you are pulling. Also, straighten the yarn after every strand you have pulled so that the thread doesn’t begin to entangle.
2. step – embroider the hair
For this step, use this hair embroidery technique shown in the hair embroidery video or follow the picture tutorials over here. I used the turkey knot for this, which is hair embroidery method 3 in my previous tutorials.
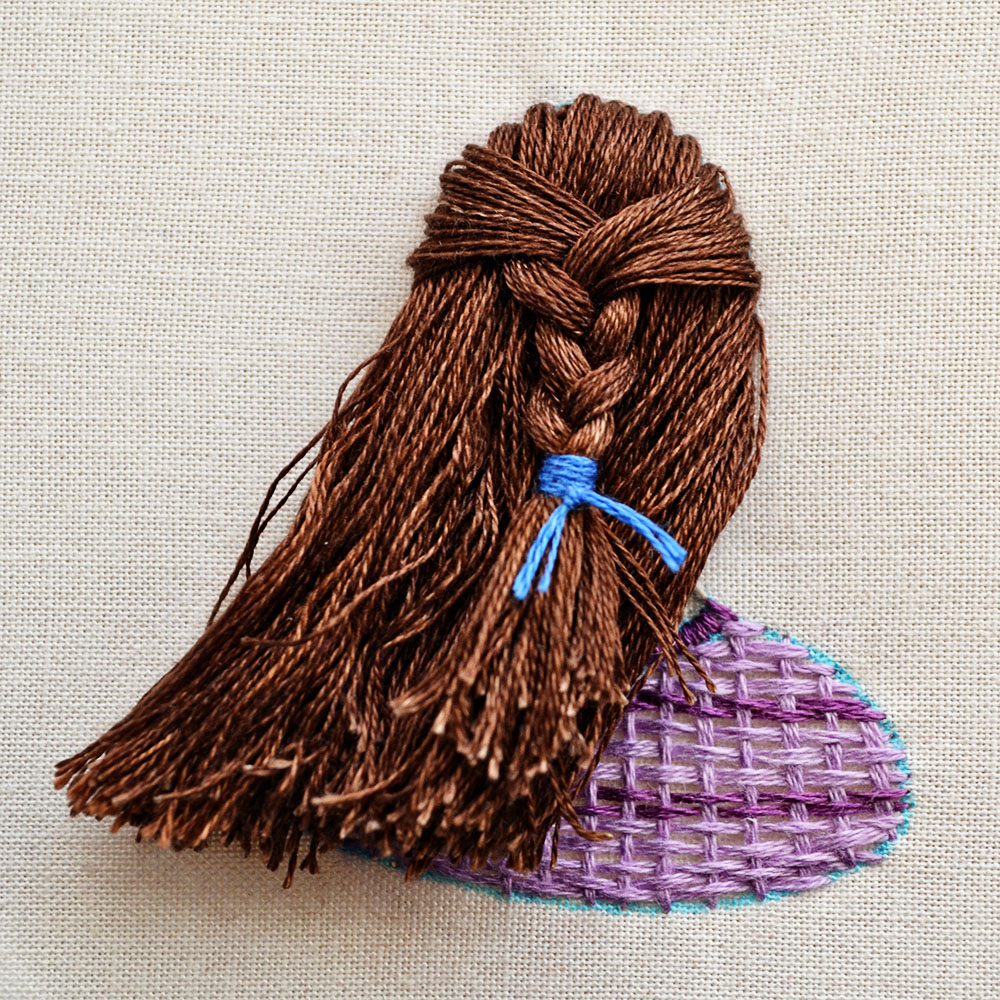
3. step – how to do the Khaleesi hairstyle
Now on to the actual braiding. Khaleesi has a different hairstyle every season. The more powerful she becomes, the more elaborate the braids in her hair. I chose to show you the hairstyles of season 3 and 4.
Watch the videos for the styling process:
Braiding tiny strands of thread can be fiddly but I’m sure you will get the hang of it quickly!
Here are some tips:
1. It helps to use a bigger needle to separate the threads.
2. Make sure to use the same amount of threads for each side. You can count them or use your eye measure – both are fine.
3. Both braids – left and right – should begin and end symmetrically.
4. To tie the braids, use a snippet of the same yarn you used for the hair. This way the ties are not so much in your face.
Hair embroidery course
If you want to learn more about the ins and outs of hair embroidery, I recommend joining my hair embroidery course! You’ll learn all the basics to make your first stitched hairy head and how to style it!