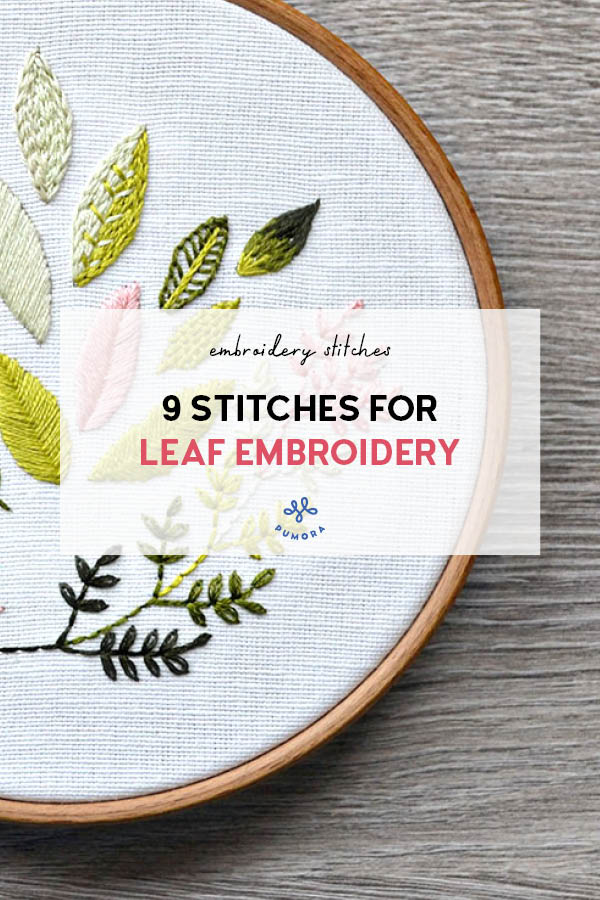
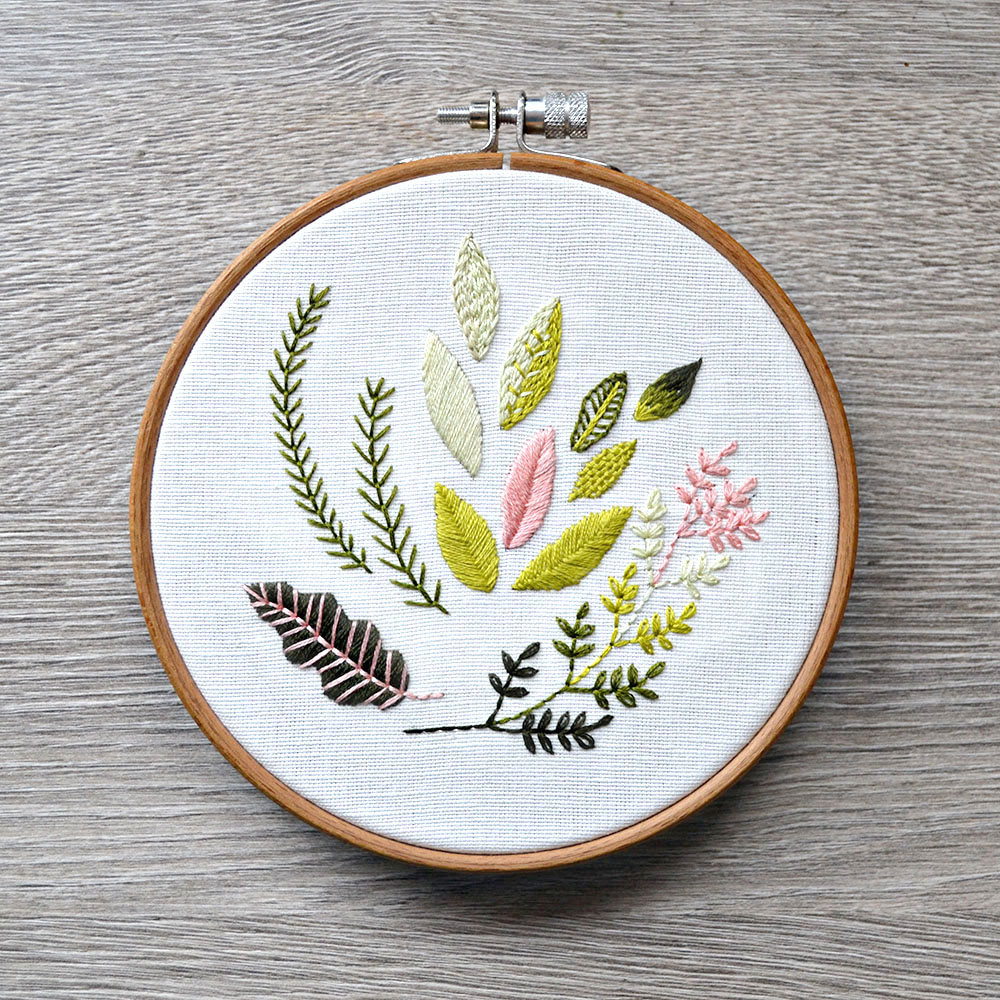
After all the flowery tutorials last year, let’s add some green leaf embroidery to our projects, shall we? There are many embroidery stitches that you can use for leaves. Yet, there are simple ways to embroider them. Here are my 9 favorite embroidery stitches you can use to embroider that pretty foliage.
How to embroider leaves – the stitch guide
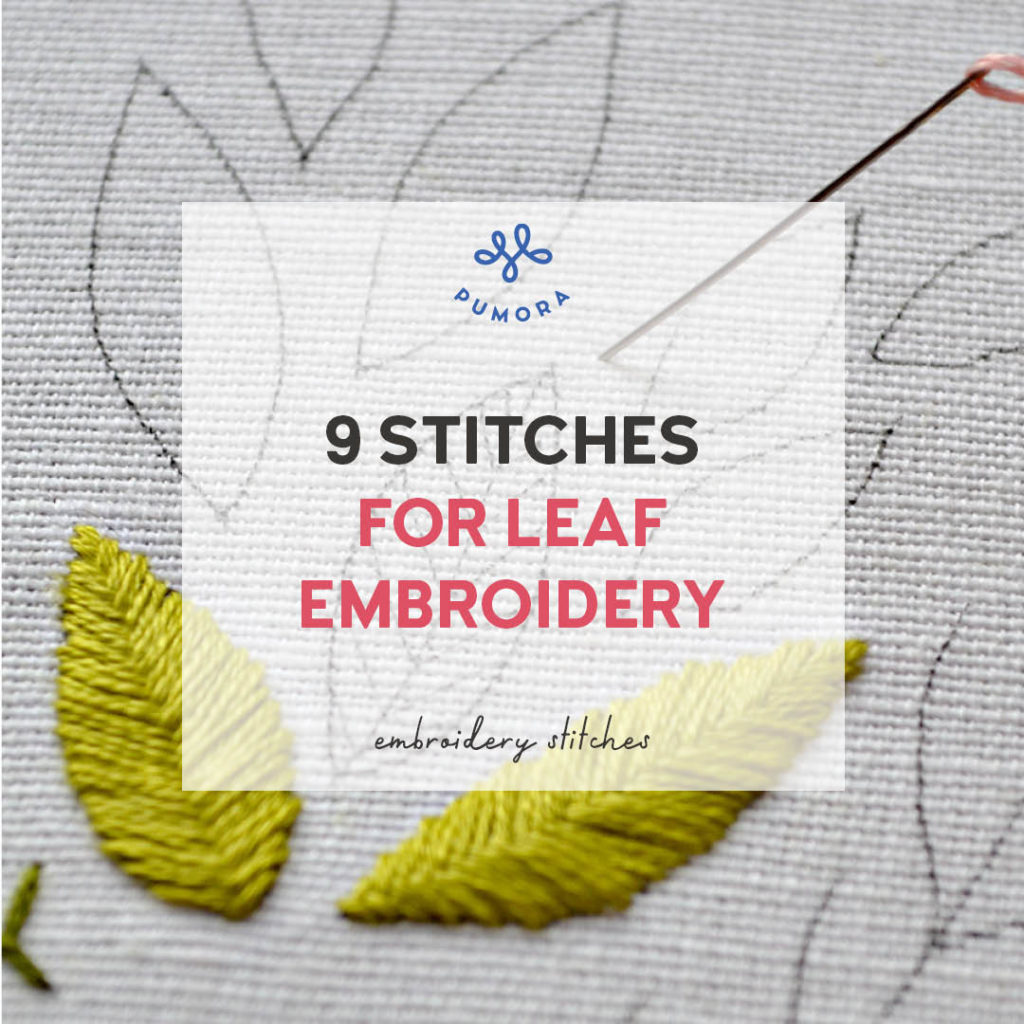
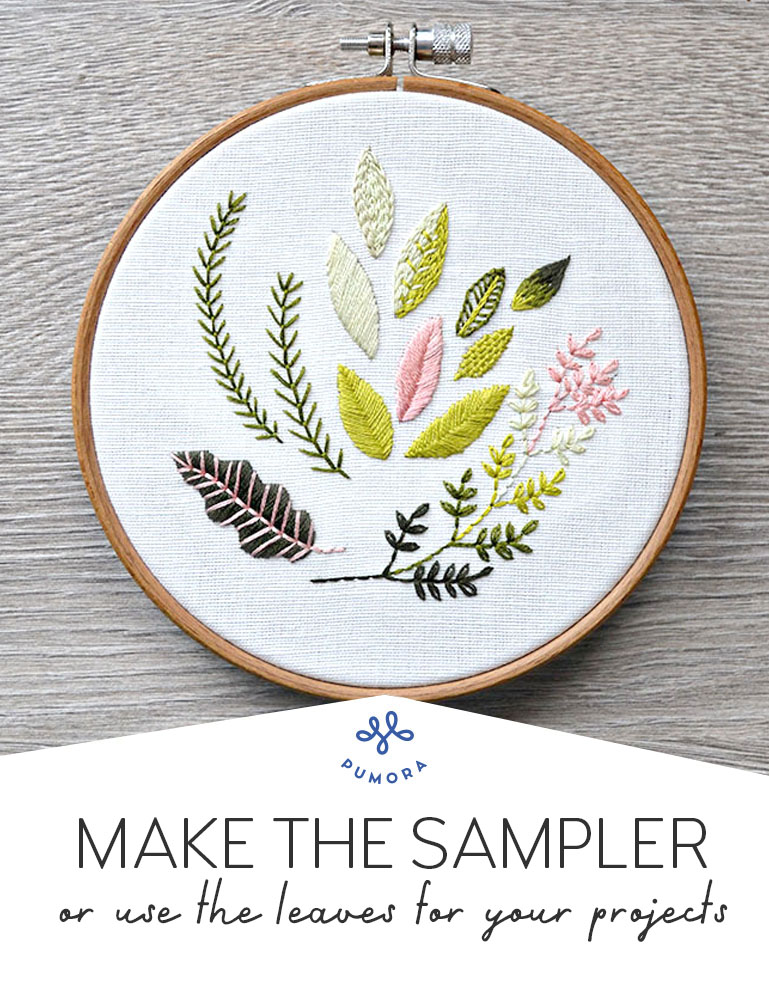
In this article, you’ll learn a variety of leaf embroidery stitches. If you would like to stitch your own leafy project, I prepared a pattern for you. In it, you’ll find all the step-by-step pictures specifically for leaf embroidery. You can get the leaf stitch guide in my Etsy shop.
Now, let’s get stitching with the first leaf embroidery stitch!
1. Embroider twigs with the fly stitch
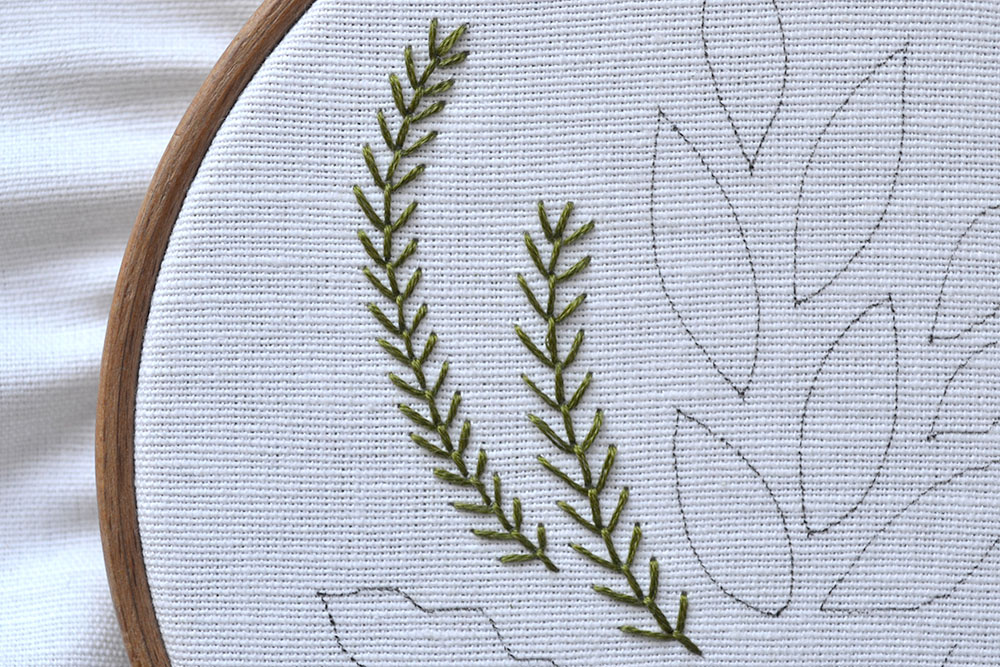
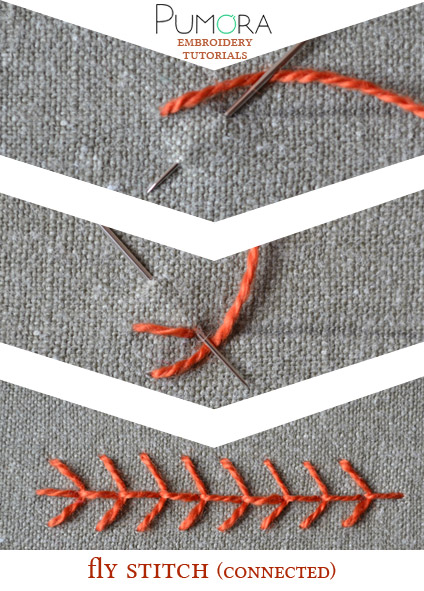
The fly stitch branch is a very simple and easy to stitch way of depicting your greens. If you like neat stitching, the fly stitch makes your life very uncomplicated. You can make it as long or short, wide or narrow as you want. By stitching the loops closer to each other your fly stitches will look more densely or open.
My leaf embroidery stitch recommendation:
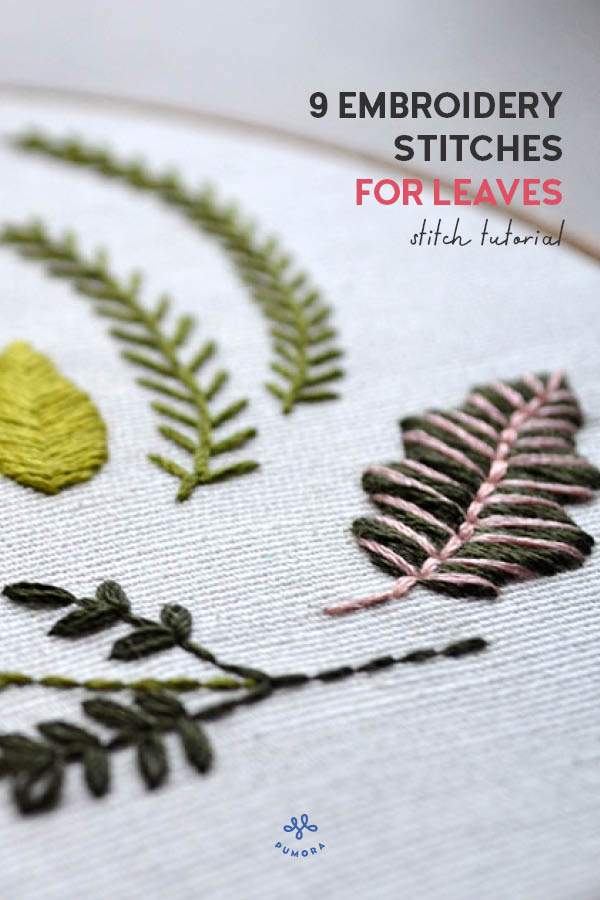
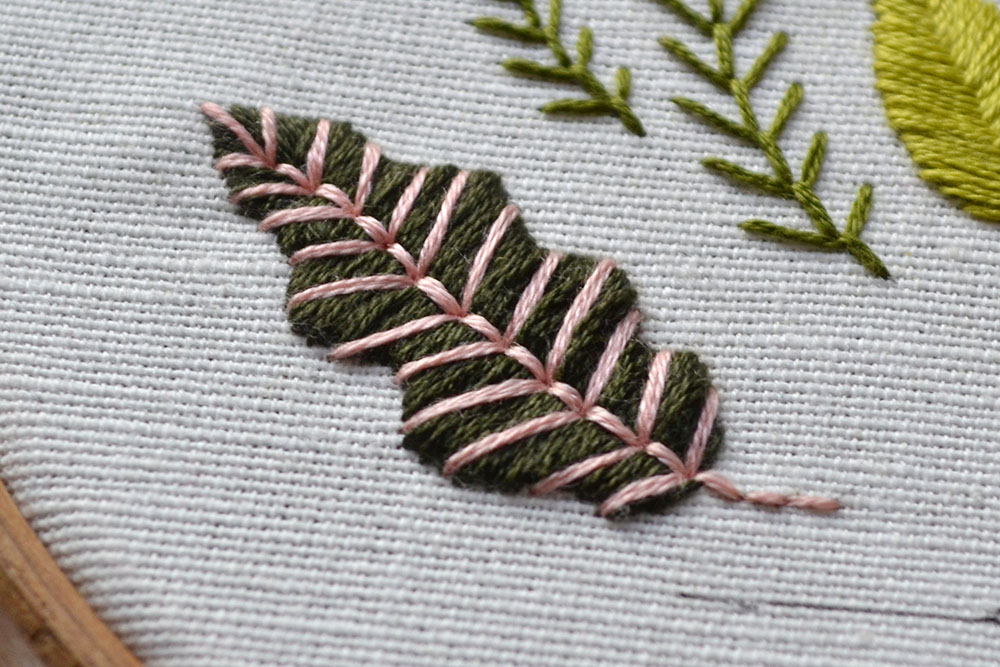
One stitch has been used over centuries in leaf embroidery. The fishbone stitch is the best stitch to embroider small and medium-sized leaves. The smaller the leaf the fewer strands you should use to get good results.
2. Oval leaves with the fishbone stitch

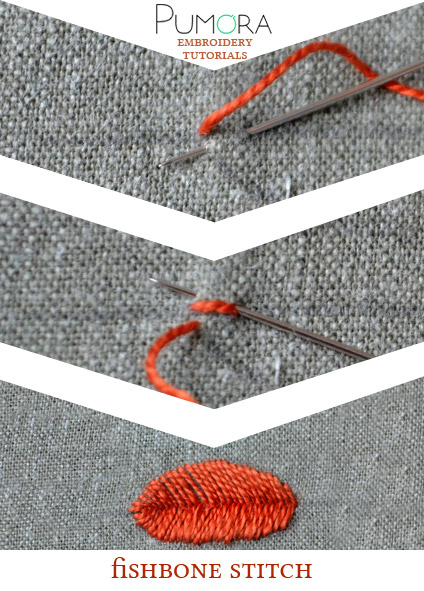
A classic take on the embroidered leaf is done with fishbone stitch. Be careful to set the threads side-by-side to cover the fabric completely. I draw a middle line into the shape to always get the stitches neat and centered.
3. Oak leaf with satin & back stitch
This leaf embroidery method is a little bit more advanced than the previous ones. Use satin stitch for the ground coverage. It works great to embroider in two columns for this.
Then, add the stem and middle line in back stitch with a contrasting color. For the additional lines, let the segments of the back stitches guide you. Use simple straight stitches to add the veins.
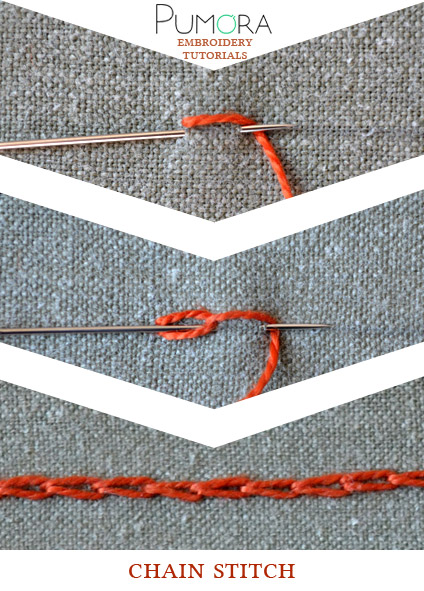
4. Leafy branches with chain stitch


Here is another way to embroider a colorful branch. With back and chain stitches, you can whip up some gorgeous broad branches to fill your flower wreath embroidery projects. You can create a lovely gradient or go with one color only.
To make this branch, start at the bottom of the first segment. Use back stitch to embroider the branches, then add the leaves with single chain stitches.
If you want to make the gradient version, switch colors after every segment.
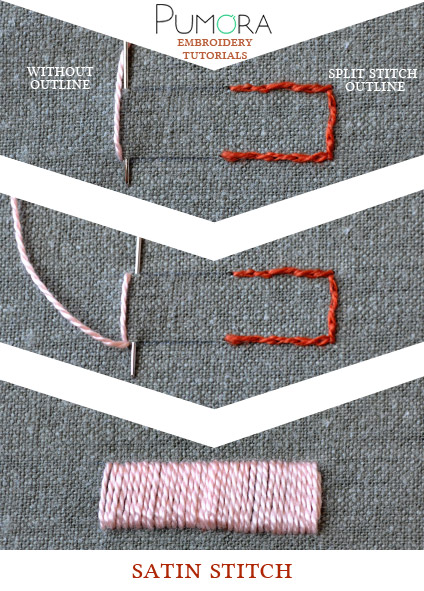
5. Embroider small leaves with satin stitch
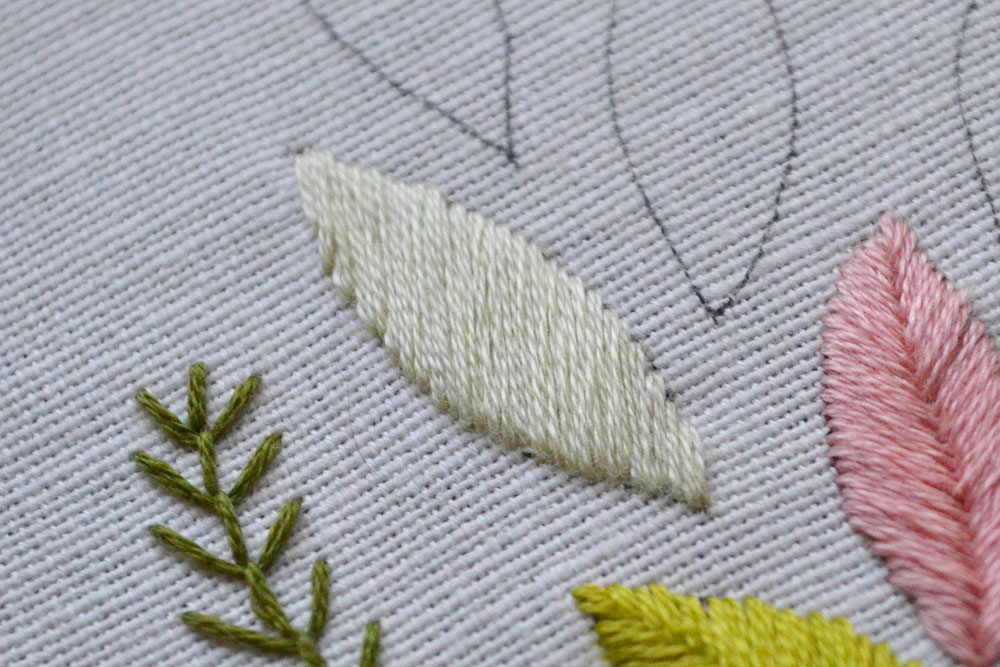

The classic satin stitch leaf can be stitched with different stitch directions. I found the slanting stitches work great for leaves. Depending on the size of your leaf shape, you can do horizontal or vertical stitches, too.
The pink leaf below is made with slanting satin stitches, too. I marked a line across the leaf and stitched each half separately.
The leaf embroidery stitch book
Do you want to stitch up your own leaf sampler? The leaf embroidery stitch book comes with the template for these 9 leafy motifs and even more detailed photo step-by-step instructions.
6. Color-blocked leaves with chain stitch
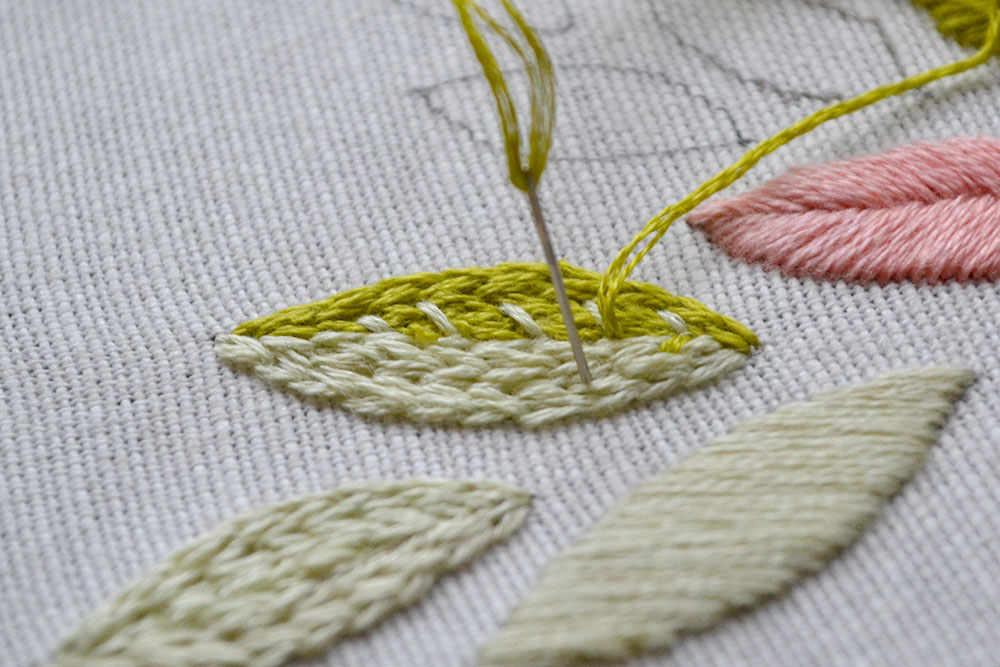
Chain stitches work amazing for lines and filling areas with stitches. For this leaf, use the chain stitch to fill the leaf one row at a time.
The leaf on the left is worked with only one color. For the other, I used two shades of green and stitched one half of the leaf shape first. Then, I used the color of the opposite side and made a couple of straight stitches to mimic the leaf adders.
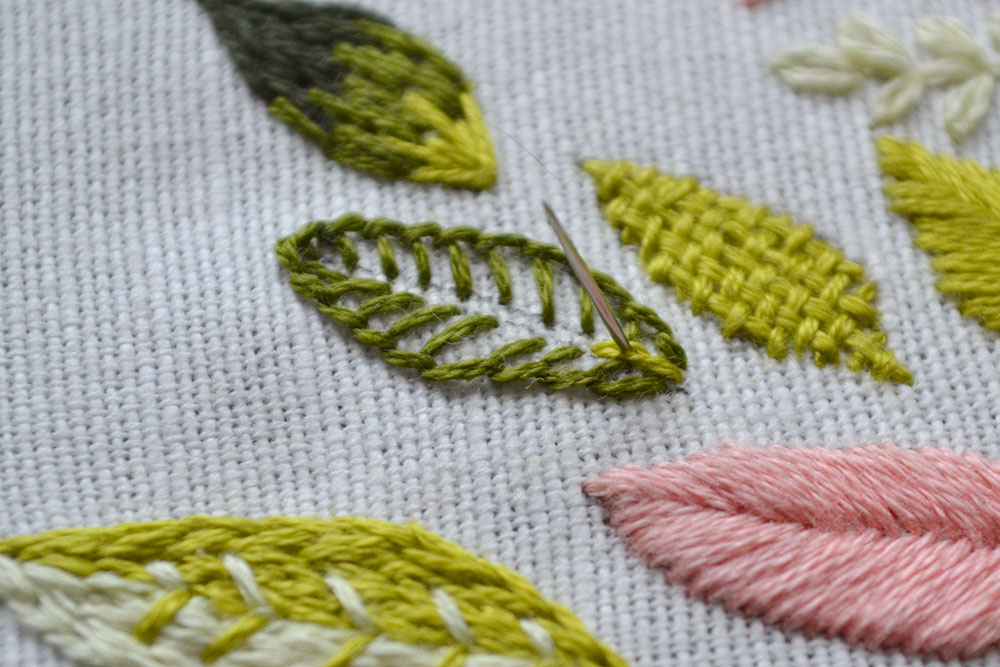
7. Textured leaves with weave stitches
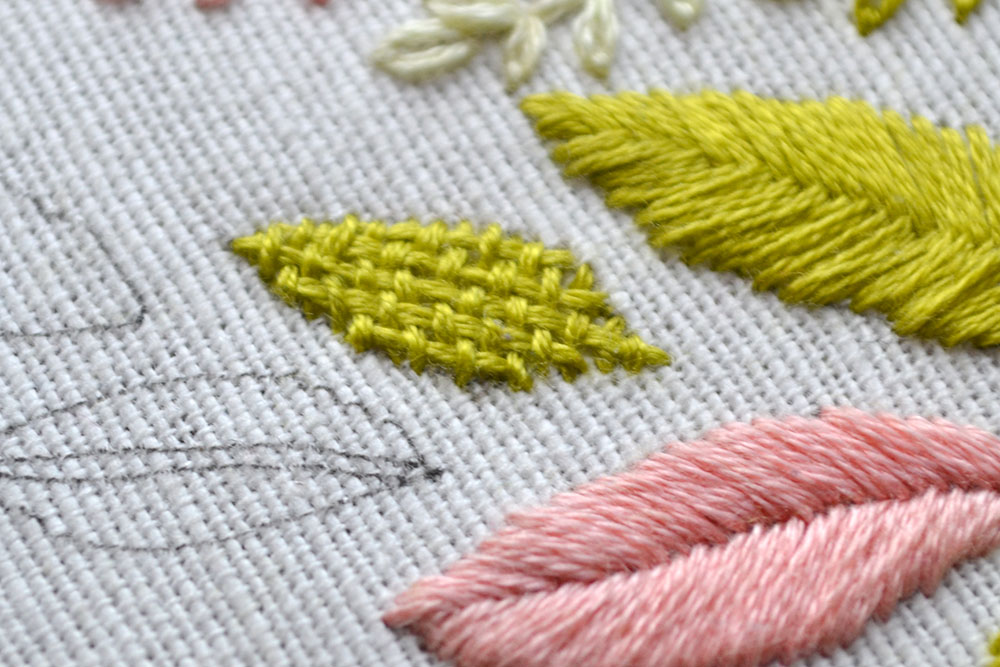
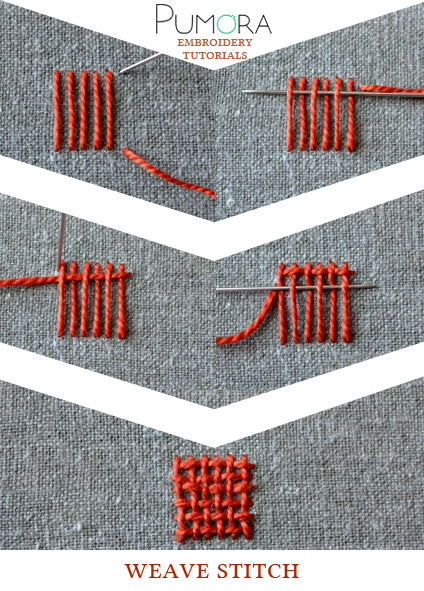
If you want to go for an unusual look, try out the weave stitch leaf!
First, set up your threads and then weave up and down, back and forth. Remember to always stitch into the fabric at the end of each row. Other than that, your needle will always stay above the fabric.
8. Painting with colors in brick stitch
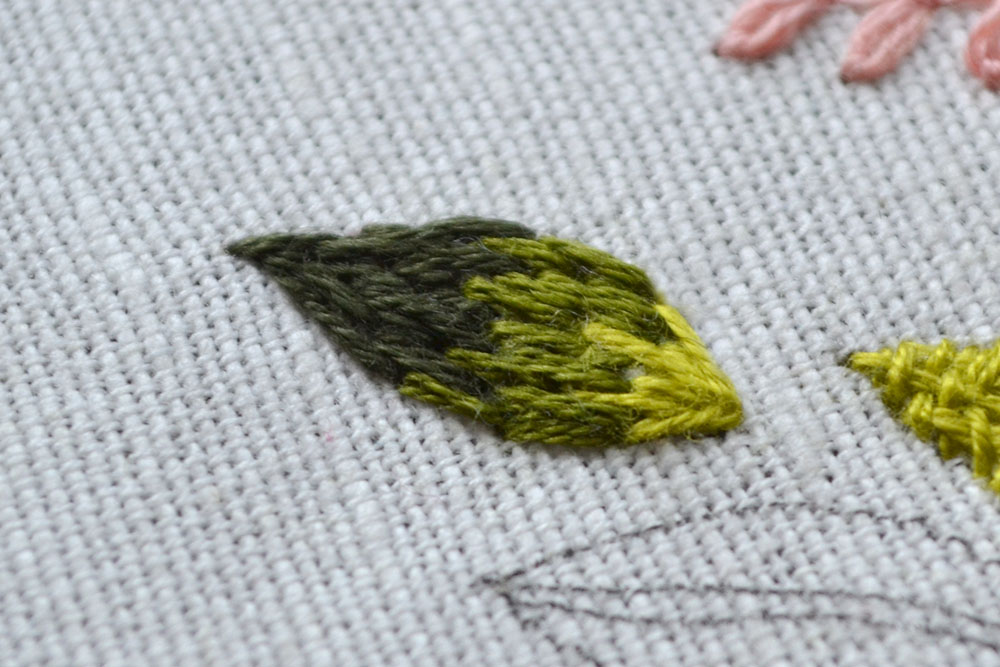
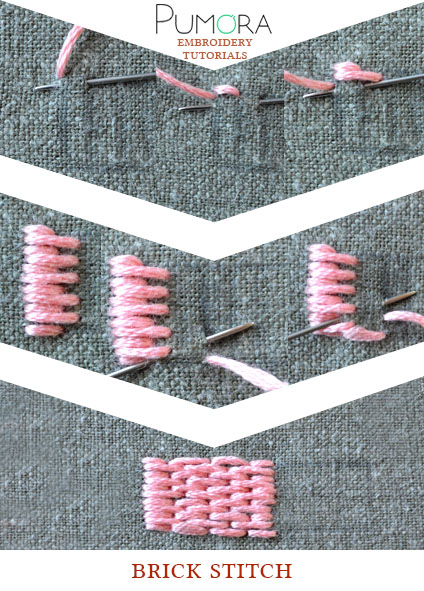
Brick stitch is actually used as a counted stitch most of the time. You set up long and short stitches for the first row. After that, your stitches will be of equal length until the last row. I used 3 shades of green here. If you want a more blended-in look, use hues that are more close to one another. Also, the thicker the threads the more obvious the transition between colors.
9. Bigger leaves in blanket stitch outlines
Blanket stitch leaves are a classic. You can alter the density of the thread by setting each stitch very close to another or more openly.
For this version of an embroidered leaf, I used split stitch in a lighter green to accentuate the middle line and make the leaf more interesting.
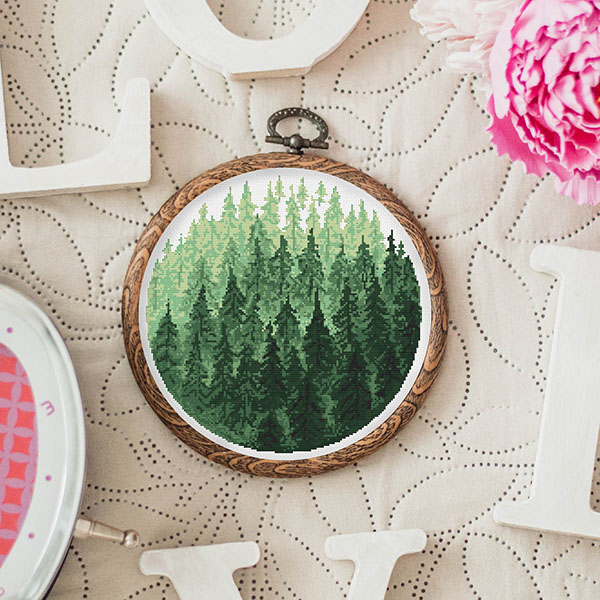
Embroidery patterns inspired by trees
Get inspired by the lush greens and stitch up your own woodland embroidery. Here is my list of embroidery patterns inspired by trees!
Do you want more tips and tricks on hand embroidery?
Join the Tutorial Alert! It is a biweekly newsletter that contains information about new tutorials & articles on Pumora, tips & tricks, and promotional content like new embroidery patterns or special discount codes.
You’ll receive an email to confirm your subscription to the Newsletter. Please also check your Spam folder and mark the email as no Spam.