Many years ago, I was fascinated by dyeing yarn and fabrics with natural dyes. It was so much fun seeing the colors develop and try out different dyeing methods. So, when I stumbled over sun printing on fabric I had to give it a go. It seems like pure magic when the color develops right in front of your eyes from a transparent mass to a stunning pattern.
Disclaimer: This article contains affiliate links.
What is sun printing?
Sun printing, also known as Cyanotype, is a method of dyeing fabric and paper with a photographic printing process. At first, the colors are transparent and then develop their color when exposed to UV light.
The trick here is to prevent the dye from dyeing the fabric at some places by covering up certain areas. This results in sometimes very unexpected effects.
Materials
- fabric out of natural material (cotton, silk, wool, linen)
- sun dye agent & fixator agent
- brush or sponge to spread the paint
- water spraying bottle
- optional: glass panes (e.g. out of picture frames)
Here are some brands that sell sun-dye paints: Inkodye, Dynaflow, and SolarFast. This set includes a sponge, the dye, and the fixator agent. It can be used on fabric and paper. There are also many more colors to choose from here and the washing detergent to remove excess dye to prevent further darkening of the dye is available here.
If you don’t want to mess around with the dyes, there are also
My experiments with sun-printing on fabric with leaves
You are currently viewing a placeholder content from YouTube. To access the actual content, click the button below. Please note that doing so will share data with third-party providers.
More InformationSince it is a dyeing process, make sure to cover your surface to protect it from the dye. Have a washcloth in reach to wipe away any accidental splashes.
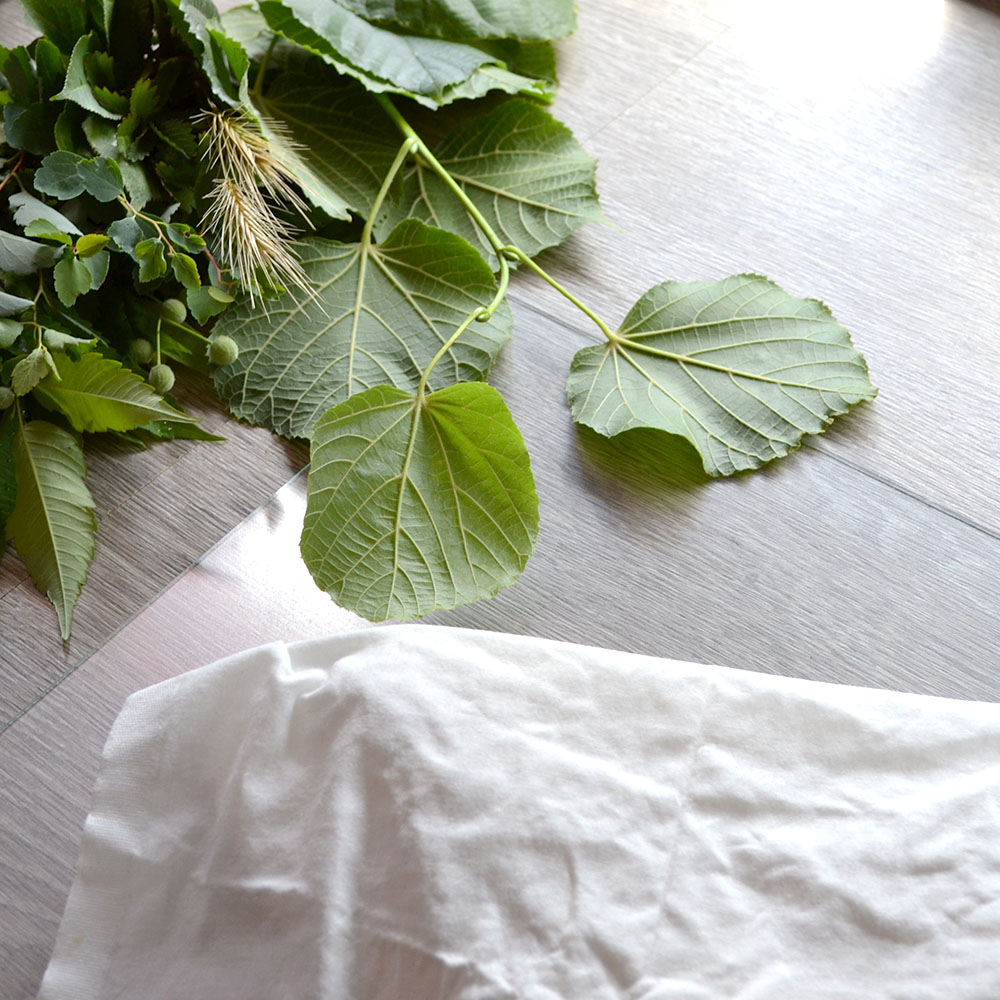
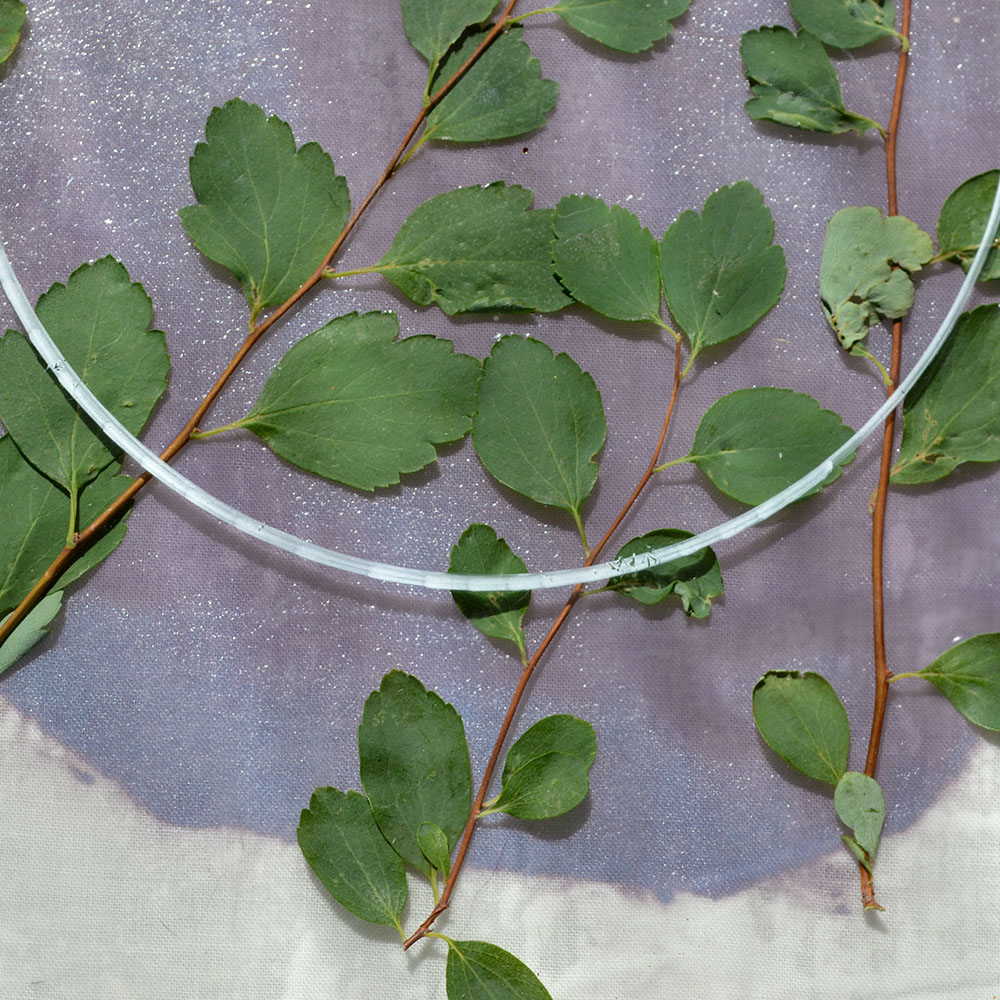
1. Pick leaves and flowers
First, select a range of leaves and flowers to put on your fabric. The larger your fabric, the more leaves you’ll need. Rather pick a little bit more than not having enough. Things like fancy-looking seed capsules (poppy seeds) or grass can add interesting shapes to your fabric.
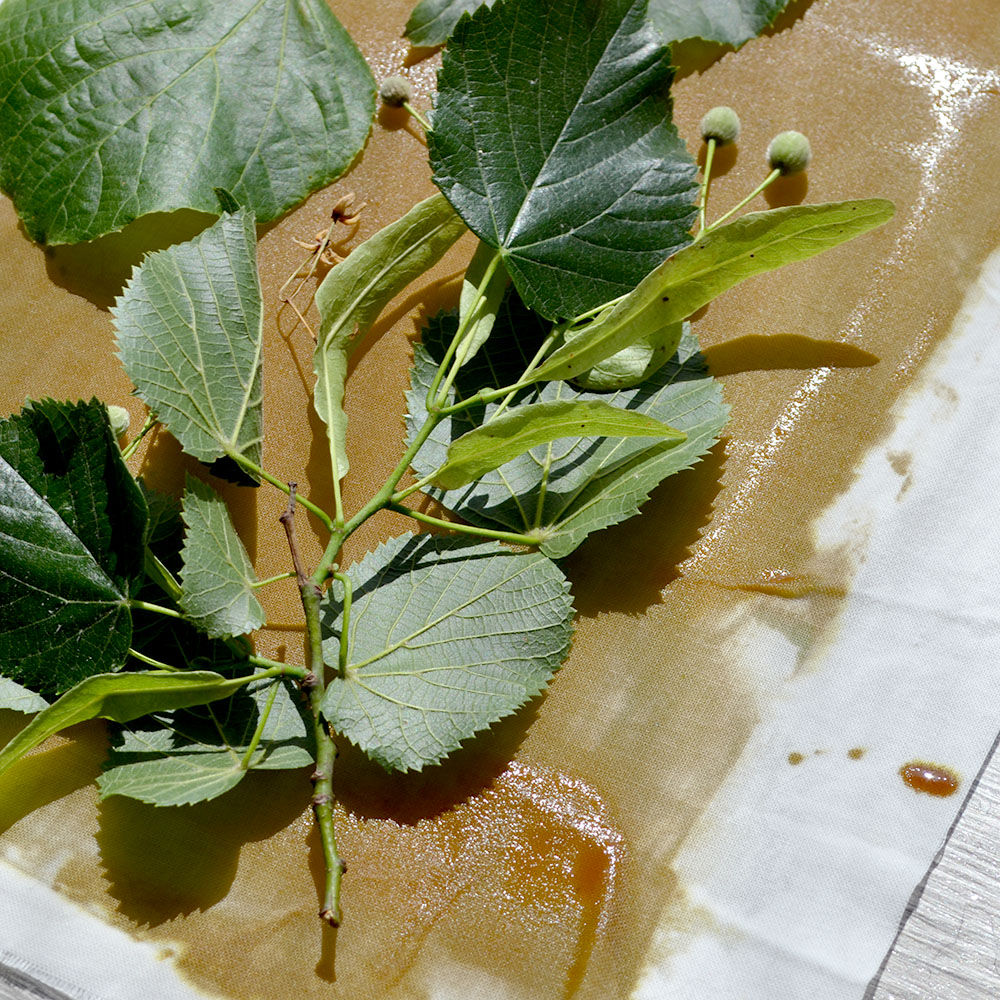
I simply went outside and picked up what our surroundings in a 5 min range held. There were wheat grains (which I didn’t use), lime tree leaves with their little seed bobbles, little twigs from our overgrown hedge, and different sizes of sprouting twigs from the vinegar tree. Explore the different shapes of leaves and flowers. Pick different sizes of them to have a range of possibilities.
I have seen people using flowers instead of sun-printing their fabric with leaves and it looks gorgeous. Because the flower petals are so thin, the sun partially shines through and leaves a hint of dyed fabric. If you have some flowers left for this, give it a try!
2. Apply the sun dye to the fabric
To avoid making a huge mess and being able to transport the fabric easily, I used some glass panes from old picture frames. They had the perfect size for my fabric and I tried to stay inside the panes with the dye.
Apply the sun-dye with a larger brush. To test it out, I sprinkled some water over one of the fabrics to see if I could achieve a watercolor-ish effect. I could not see a huge difference except at the edges that were less crisp with the wet fabric.
When you apply the sun dye, make sure that you don’t have wrinkles in the fabric or they might cause shadows which results in fine lines in the dyed fabric later.
Make sure to prep everything in indirect light or even better – in a dimmed room. If you are working in a bright room, the dye will begin to set in before you even have a chance to put your leaves on! I used my sun-blocking roller blinds and they worked great. You don’t have to be in a pitch-black room. However, it might be better to dye and lay on one piece of fabric after another instead of preparing all at once. This gives you enough time before the dye sets in even in a brighter room.
Important note: don’t use the brush to dip into the dye bottle if you are working with more than one color. Either use individual brushes for each color or better pour your dye liquid in a separate bowl and use the dye from there. Also, don’t pour back the liquid into the bottle again or the dye can start to react inside of the bottle. I had to learn it the hard way and now I have a bottle with a blue dye that has started to become green because I accidentally mixed in the other dye with the brush.
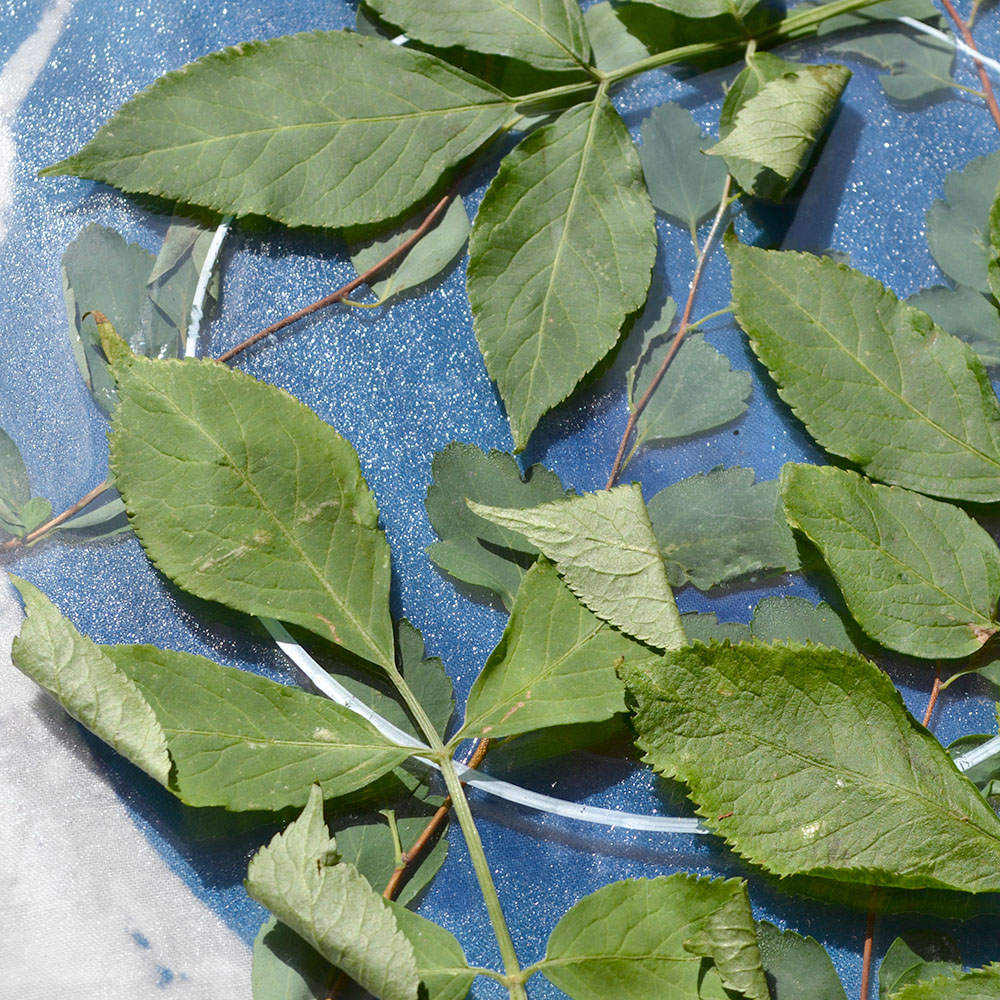
3. Adding the leaves and flowers to your sun-print fabric
Now, on to the fun part! Lay your leaves and flowers or seeds on top of the fabric.
When everything is where it should be, place the fabric in direct sunlight. Depending on the sun-dye you have, you’ll need really direct sunlight as in blazing sun without clouds.
My first attempt was on a cloudy day and it worked nonetheless (inside the room). I did place it at the window though and it was quite bright outside. The day of the second attempt was really sunny and it dyed much quicker than the day before.
Achieving special effects in sun printing
Layering effect
Usually, you would place the objects all at once and then let the dye set. This looks great but it also is quite one-dimensional as the pattern later has only one shade. However, you can achieve a layering effect if you remove or add leaves during the dyeing process.
In the picture below, I added the longer leaves later to cover some of the areas for a short amount of time so that it would only be a hint of a leaf instead of a blank white leaf.
Lines and lettering
You can add lines or even lettering to your sun-printed fabric with the help of a glass pane. Write or draw your design on it and place the pane on top of the leaves on the fabric. Use a marker that is opaque. The whole point is to block the light so that the dye on the fabric doesn’t develop its color.
I wanted to test if I can use a chalk marker to add geometrical shapes to the pattern. And it works! The glass pane also helps to keep the leaves pressed down and stay where they should. Here is the end result:
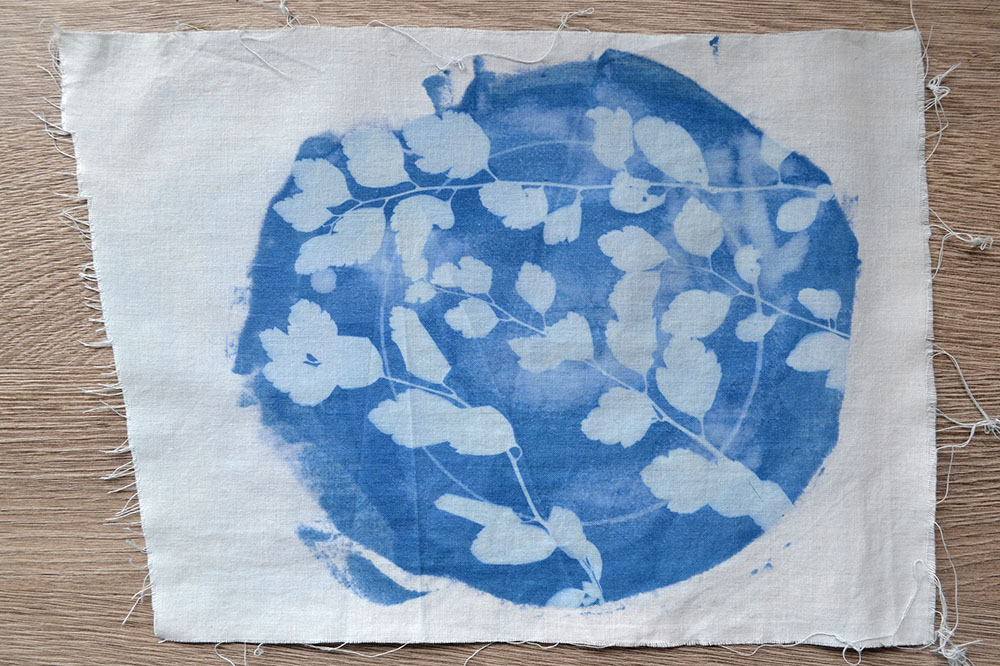
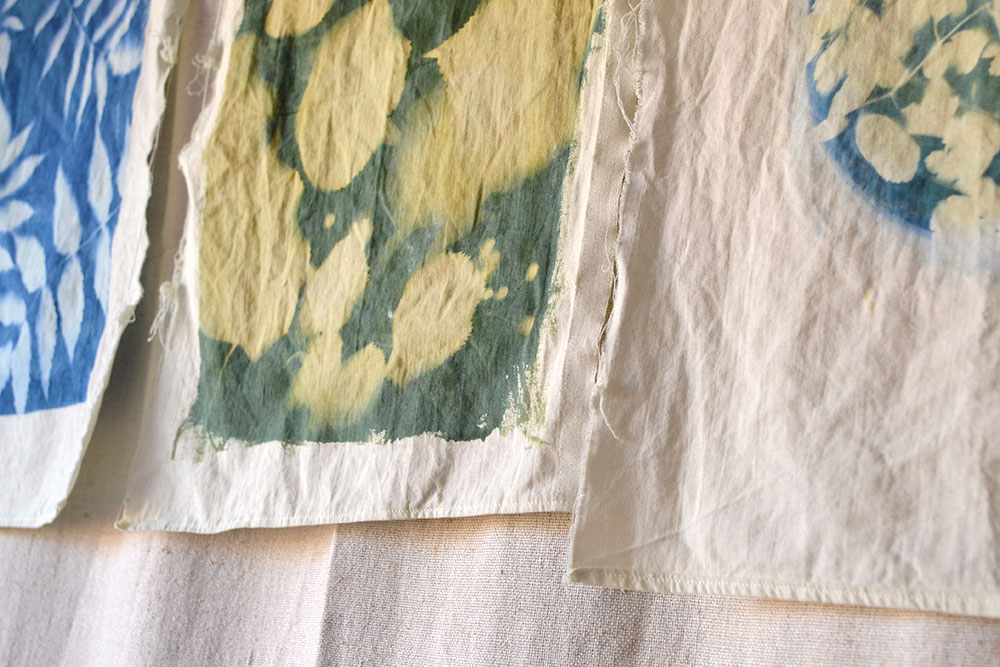
As you can see, the first round of leaves is very crisp and easy to see. The circle from the chalk paint is there, too. The leaves I put on later created these cloudy irregular shapes in the background which adds more dimension to the pattern.

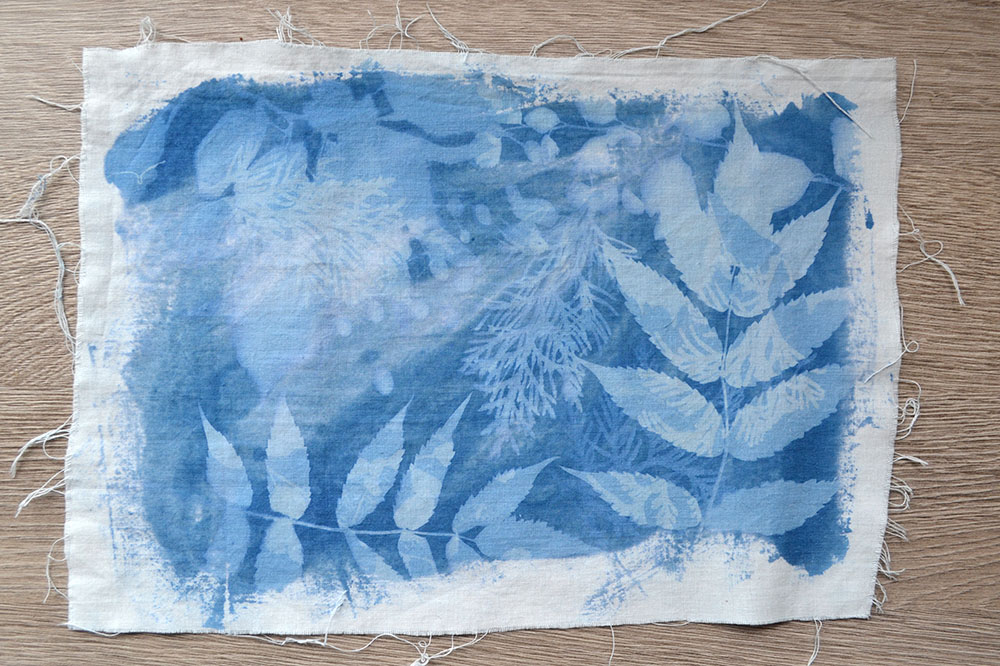
For this piece of fabric, I added lots of different leaves and took away the first round of leaves, too, so that they would show more color later. I find it resembles an underwater scene with the light shining from above.
Using other objects
For the sun printing process, you can use really any inanimate objects. At one point, I started adding embroidery supplies to see what happens. It turned out great and I will use this spread of fabric for a project bag later! Look how 3D the mini embroidery hoop looks because of the shadow it cast in the sun.


Important step: wash after dyeing
When the dye has reached the level of color you want, take away all the plant matter and rinse the fabric quickly or put it directly in the washing machine. Don’t wash it with your regular clothes or the sun-dye paint might stain them. Use the fixator agent of your solar dye agent to set in the colors. This is very important because otherwise, the remnants of the dye in the fabric will continue to develop further over time. Trust me, I learned that the hard way. Sadly none of the projects you see in this article look as crisp as in the pictures anymore. I didn’t know about the fixator agent and just rinsed the dye out and washed it in the washing machine. This is not enough!
Also, don’t mix different sun-printing colors or they might stain your other pieces of fabric. You can add some dark towels if you don’t want to waste water. I used a very short wash cycle and added some dark blue towels that would have gone in the washing machine anyway.
The washing process strips away all of the dye that hasn’t yet been developed by the sun.
I’m still monitoring the fabric to see how much darker it will get, but until now it has developed a light blue color instead of the original off-white. So be aware that this might happen. Also, a reader of mine reported that her dye was a bit yellow (she used the teal color) instead of transparent. Luckily, after a couple of days, the color set into a real teal and white on her fabric. So, if this is the case in your project, don’t panic. It might set in later.
What to do with sun printed fabrics?
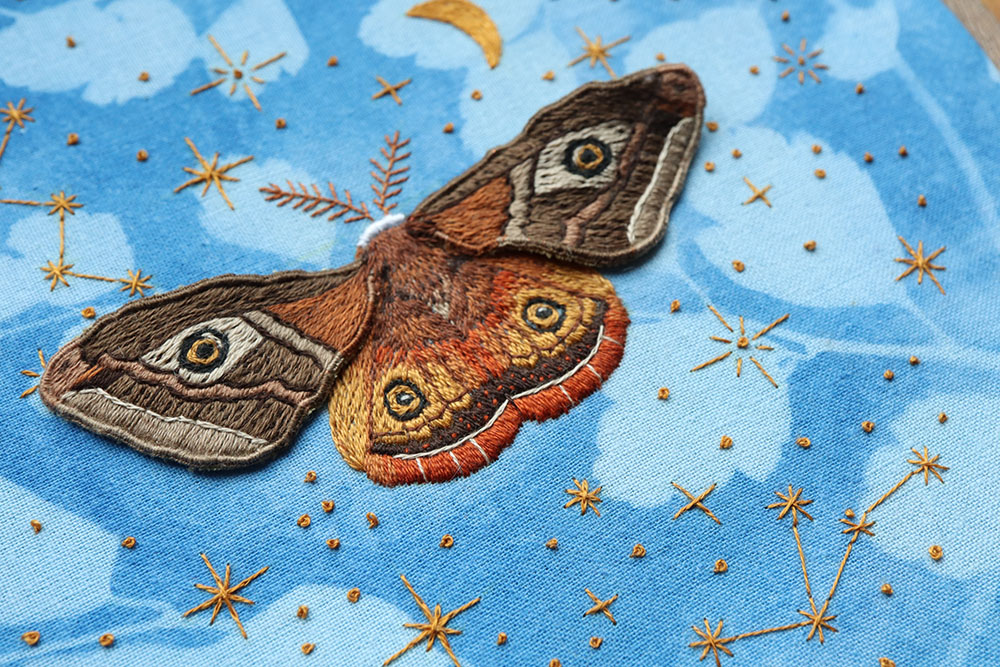
With the sun-printed fabric, you can make anything that you would use regular fabric for. I used one of mine for the magical moth friend pattern by Emillie Ferris. You can see it below.
Here are some ideas on how to use the fabric
- frame the fabric for decoration
- use for hand embroidery projects
- sew a project bag
- sew a scrunchie
- if fabric is big enough, clean up the edges and use as a scarf
- make unique cloth napkins
- if you have even more fabric, sew a dress or cami like this
Instead of dyeing fabric, you can dye finished items, too. Be careful though that the fabric is out of natural fibers and that you can wash them in the washing machine later.
Using other paints
I have read that you can use other paints like acrylic or fabric paint. Though I have not tried it out yet, it might be a great alternative to using solar dyes that are sometimes hard to get at all. If you just want to try out the technique, give it a go!
The steps are the same as with regular solar dyes. Wet the fabric, apply the paint, lay the leaves on top, and let it set in the sun. From reading, the time you have to let the paint set is much longer than with solar dye though. One blog mentions leaving it for 1-2 hours in the sun until the paint is dry. Remove the leaves then and put the fabric in the dryer on a high setting to set in the color. Wash the fabric by hand to remove paint remnants and avoid staining your clothes – or wash with dark towels in the washing machine.
However, this is not actually a sun-dyeing process. I’m not sure if you even need to expose it to the sun. I will test it out and report but my suspicion is that the sun doesn’t play a major role in this type of dyeing. Most probably the leaves prevent the dye to set into the fabric where they lay. Also, the fabric will always be wetter under the leaves because the dye doesn’t dry there at all. If you apply water drops on wet acrylic paint on canvas, you’ll be able to wipe away the paint at those spots later when the paint has dried in other places. It might be the same effect and in this case, the sun is only there to accelerate the drying process of the fabric paint.
Even though it is not technically a solar dyeing technique, it is a great method to try out if you don’t have the solar dyes available to you!
Do you want more tips and tricks on hand embroidery?
Join the Tutorial Alert! It is a biweekly newsletter that contains information about new tutorials & articles on Pumora, tips & tricks, and promotional content like new embroidery patterns or special discount codes.
You’ll receive an email to confirm your subscription to the Newsletter. Please also check your Spam folder and mark the email as no Spam.