This beginner embroidery guide is somewhat a note to my younger self. A list of tips, notes, and knowledge I wish I had known back when I was just starting out. Do you feel overwhelmed by the vast amount of advice, tools, and materials for hand embroidery? This article gives you an overview of the basics you need to know to start your own stitching journey.
You’ll discover that hand embroidery actually is very easy to begin without spending a huge amount of time and money! Once you get the needle moving, you can learn new techniques and embroidery stitches or use the skills you already learned. In hand embroidery, you can create beautiful work no matter how many stitches or fancy techniques you know. The most important step is to start 🙂
Hand Embroidery for Beginners eBook
All the first steps in one place – in the eBook “Hand Embroidery for Beginners” I’ll teach you all the basics step by step.
Disclaimer: This article contains affiliate links.
Every craft has its own special feeling to it. Embroidery for me is a wondrous craft because it is actually just a needle and thread you are using. You can take it everywhere, and it doesn’t take up a lot of space. Needle and thread can be used on any surface you can make a hole into. It is not restricted to fabric – every mesh type of material works and there are even people embroidering wood, metal, leaves, and toasted bread.
For now, I will stick to the basics and start with embroidery on fabric. But which fabric is good for embroidery you ask?
What is the best fabric for embroidery?
There are many different kinds of fabric you can choose from and I get that you might feel overwhelmed with the many options. For every type of embroidery – yes, there are many – you will choose a type of fabric. For counted stitches like cross stitch, you would use a different type of fabric than for surface embroidery. There are types of embroidery done on tule or other lightweight fabrics and ones that are traditionally stitched on wool or linen fabrics.
What is the most used fabric for embroidery?
Take a simple non-elastic cotton bed sheet or pillowcase into your hands. What you can now see and feel is exactly what many people use for the type of embroidery I’m teaching you here in this article.
If you want to test out embroidery without buying a lot of stuff, use the fabric you have in your home first. Maybe you have a pillowcase to spare and use that for practicing stitches.
Types of fabric that are very easy to stitch on
- cotton and linen fabrics in general if they are not elastic
- patchwork/quilting cotton
- plain cotton muslin (or calico)
My recommendations
I like Kona Cotton solids as they are available in many colors. This cotton-linen blend fabric is also fabulous. For plain linen fabric with a bit of texture, this shop has a lot of colors for linen fabrics.
Avoid these fabrics in the beginning
- satin and other very smooth and shiny fabrics
- jersey and other stretchy fabrics
- velvet, corduroy, and fleece
- gauze and very thin and transparent fabrics
If you want to read more about fabrics for embroidery for beginners, head over to this article: Choosing fabrics for hand embroidery
Which embroidery threads do you need?
Like with fabric, threads come in a huge variety of materials and forms. However, there are two types of thread that are used the most for embroidery: stranded embroidery floss and pearl cotton.
Stranded embroidery floss
Many modern embroidery patterns call for 6 stranded embroidery floss. This is a common thread made out of 6 thinner threads. The special feature is that you can separate them to adjust the thickness of the thread. Let’s imagine you want to stitch something very small and delicate – then you’ll use 1 or 2 strands of embroidery floss. If you want to go bolder or larger – use 4 or up to all 6 strands. 6 stranded embroidery floss comes in many colors and is available in different materials like cotton (the most common one), wool, linen, or polyester.
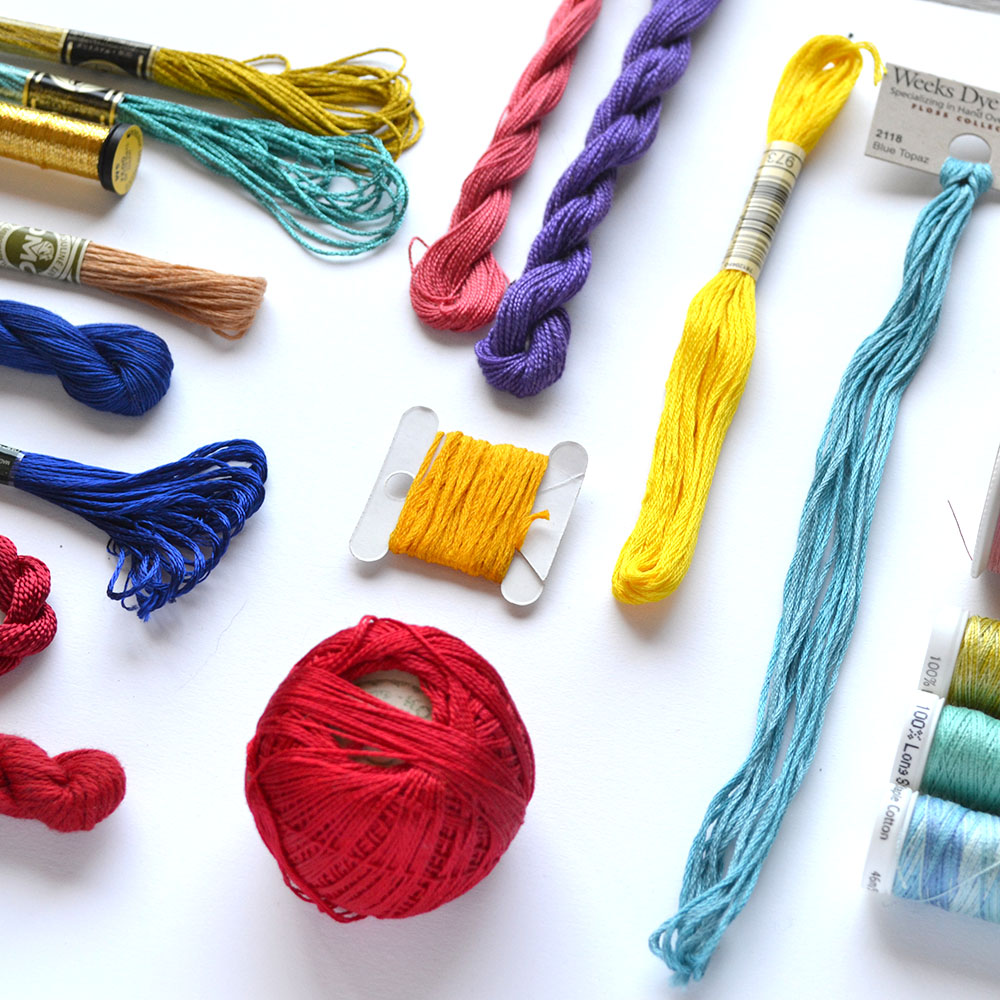
Pearl cotton
So what about the other type of thread, pearl cotton? This one might look similar to the regular 6 stranded embroidery floss but it is made differently.
Pearl cotton consists of multiple threads twisted together but unlike the 6 stranded embroidery floss, you are not supposed to separate them into individual strands. The difference in thickness of the thread is not adjustable manually. However, there are different thicknesses available for pearl cotton.
What is the best embroidery thread for beginners?
As much as I love the look and feel pearl cotton, the 6 stranded embroidery floss is much more versatile and beginner-friendly. Many modern embroidery patterns on the market use this type of thread and investing in 6 stranded embroidery floss is what I encourage you to do before diving deeper into the world of specialty threads.
My recommendations
You can buy embroidery floss colors individually for specific projects but if you want to try it out first, you might enjoy a color-coordinated set like this pastel one or this rainbow set from Sublime Stitching.
TIP: if your pattern uses color numbers for a floss brand you don’t use, try this color conversion chart on Cyberstitchers. They have a lot of different conversion tools on this page.

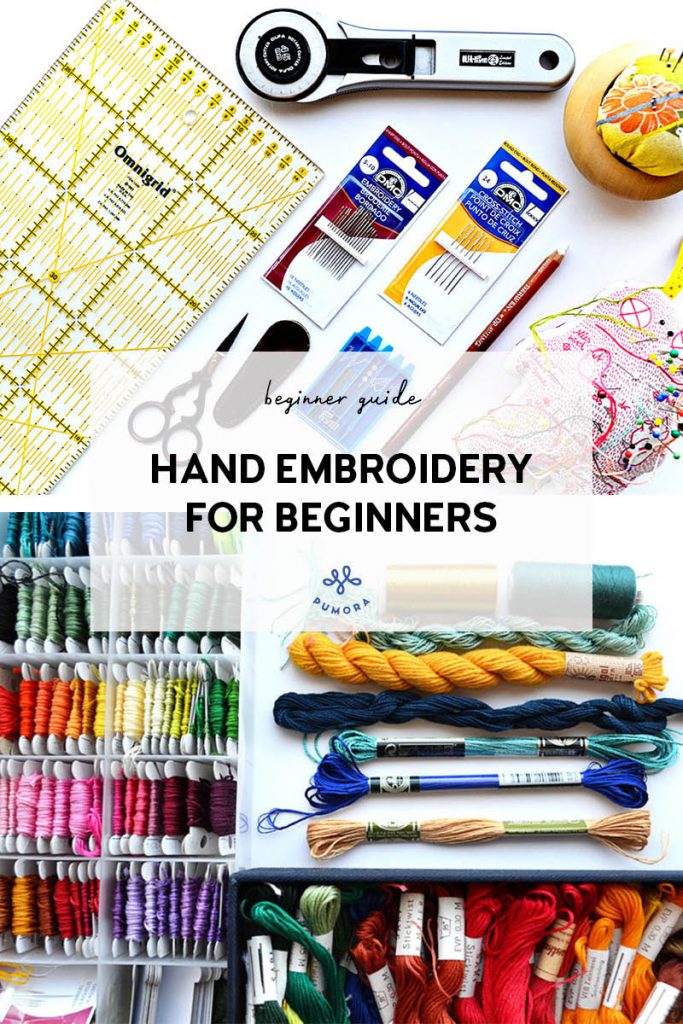
Which embroidery tools do you need as a beginner?
Starting a new craft from scratch often comes with investing in new materials and tools. I’m sure you want to take a look first and see if this new hobby is for you before you go all pro and buy that embroidery frame stand for hundreds of dollars right?
First, I want to say that you technically don’t need anything other than a set of embroidery needles and a pair of sharp and pointy embroidery scissors. The rest is extra – even the embroidery hoop. But I encourage you to get some sort of embroidery hoop or frame to make your life easier in the beginning. There are also many tools that help you with very specific problems. Read more about them in this article about embroidery helper tools.
What you need to know about embroidery needles
First of all, ditch the old rusty sewing needles you have found in the attic. It took me years of cursing before I bought a new set of needles and I never looked back to my old ones after that. Why? The rusty or grey patina on old needles can stain your thread and fabric. So don’t risk ruining your project to save one dollar (those needle sets are really cheap).
Ok, mini-rant over.
My recommendation
Embroidery needles have a slightly longer eye than regular sewing needles. Look on the package if it says “embroidery needle” and go for a needle set like this. I’m a huge fan of needle sets because you can try out all the sizes and see which works best for your hands.

Pointy or blunt tips?
Pointy tips are useful when you have to pierce the fabric. For regular surface embroidery, pointy needles are commonly used.
Blunt tips are useful when you want to slide between the threads of the fabric or other stitches without splitting them. Blunt needles are commonly used for counted embroidery like

Embroidery hoops and what they are good for
There are a lot of different embroidery hoops out there. The most common ones are wooden hoops. I find them very easy to use as a beginner and you can get them in a huge range of sizes.
A size between 6 and 8 inches in diameter is the most comfortable to use for many people. If you can’t decide, take a 6inch hoop.
If you want to do smaller embroidery or embroider clothes get a 4inch/10 cm hoop, too. On Etsy, you can find a huge variety of embroidery hoops.
There is a lot I could tell you about embroidery hoops. In fact, here is an article explaining all the different kinds of embroidery hoops and how to use them.
Scissors for hand embroidery
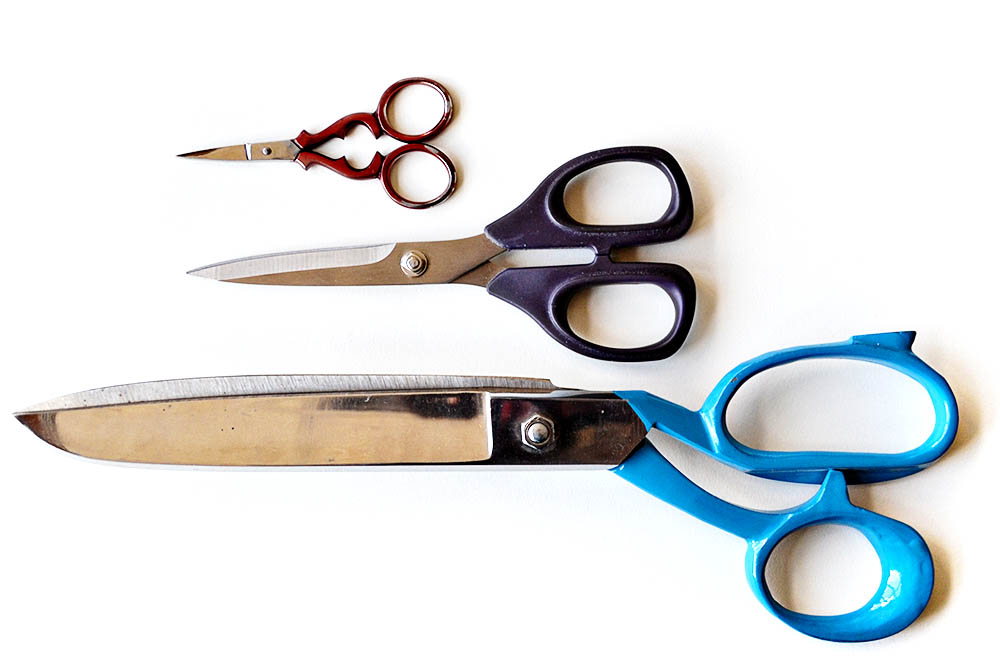
Tiny stitches call for a tiny tool. Embroidery scissors are very short and have a pointy, sharp blade. Because of this, you can comfortably snip into stitches to unpick them and trim away long thread ends. Use your embroidery scissors for thread only. Avoid cutting long distances of fabric with these poor tiny things. And please, PLEASE, don’t ever cut wire or paper with embroidery scissors.
Embroidery scissors come in various shapes and forms so if you like fancy tools, here is a selection of pretty scissors on Etsy.
I also like to have a pair of fabric scissors around me. Regular household scissors often don’t cut fabric well. A medium-size one (the middle one in the picture below) is enough for embroidery purposes. The big ones are called tailor’s scissors (the one at the bottom in the picture below). They are for cutting out large pieces for sewing.
How to transfer the pattern to the fabric
So, now that you have your tools and materials at hand, you are ready to tackle the actual embroidery. But how do you get that embroidery pattern on the fabric? This is one embroidery question I get asked by beginners a lot.
One method that works without any extra supplies is the light method. It works great on fabrics that have a light color and are not very thick. If you hold your fabric towards the window and can trace the lines through, this method works for your fabric.
Use an erasable pen (I use the frixion pens by pilot), air- or water-soluble marking pencils to bring the pattern on the fabric. You can use pencils but don’t use a soft one with lots of graphite in it. This can stain your threads, especially if you are using very light colors or white.
Here is a step-by-step tutorial on how to transfer a pattern with transfer paper.
Very easy to use is the so-called Fabri-Solvy. It is available in a sticky and non-sticky versions. You can either trace or print your pattern on it and then attach it to your fabric. When you are done with the stitching you can wash it away with water without a trace.
How to put the fabric into the hoop
Learn more about fabric tension and what to watch out for in this embroidery tutorial.
You are currently viewing a placeholder content from YouTube. To access the actual content, click the button below. Please note that doing so will share data with third-party providers.
More InformationStarting and ending embroidery threads
Attaching your threads to the fabric before and after stitching is very important. You can achieve this through multiple techniques. Some are working better for dense stitching, some are great when there is not much to attach your thread to in the back of your work.
I encourage you to try out more than one technique for beginning and ending a thread and decide which one you like better, then.
Starting the thread
The Knot
Be aware, knots are not seen as good practice.
However, I use it more often than I want to admit and especially if you have other things to do than making your embroidery back pretty – like learning stitches – I find it totally ok to use knots.
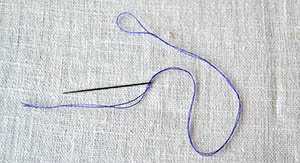
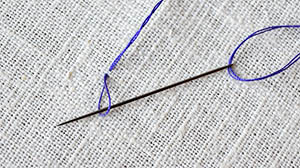
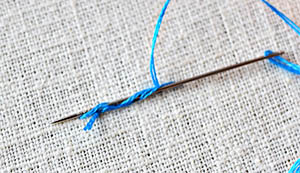
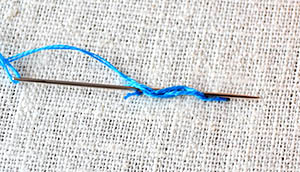
The Loop
If you use stranded embroidery floss in an even amount of threads, the loop method is perfect. It leaves no trace of where you started the thread at all.
Instead of using 2 strands, use double the length of a single strand of floss. Then fold it in half and pull both ends through the needle.
Then, begin the first stitch by leaving the loop hanging at the back, make a tiny stitch, go through the loop in the back with your needle and tighten the loop.
Ending the thread
Weaving in the End
Use the previous stitches to pull your thread’s end through. I go in one direction first, then back again slightly apart from that.
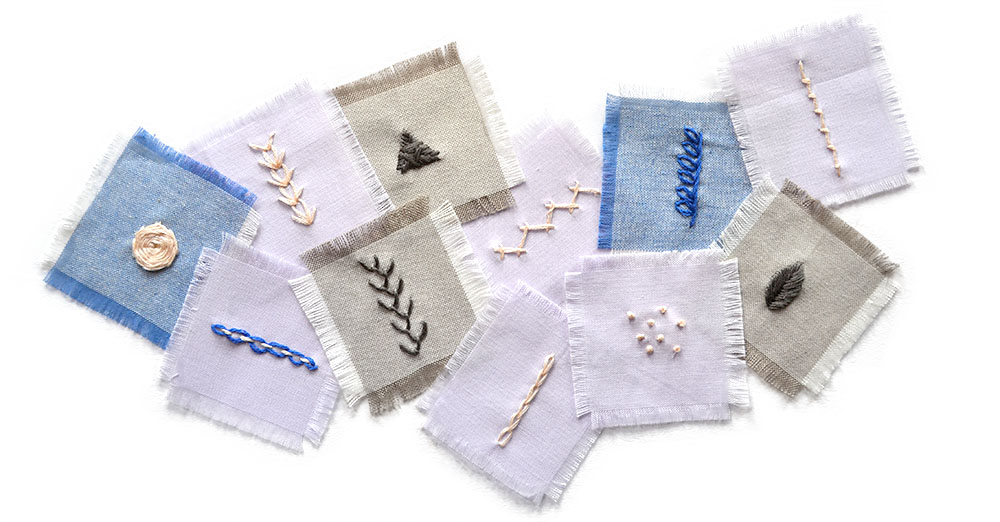
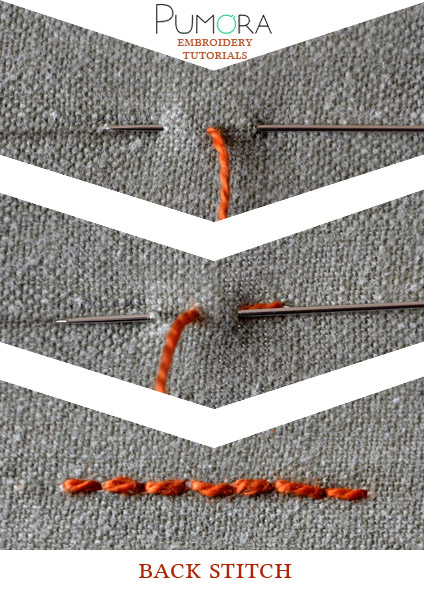
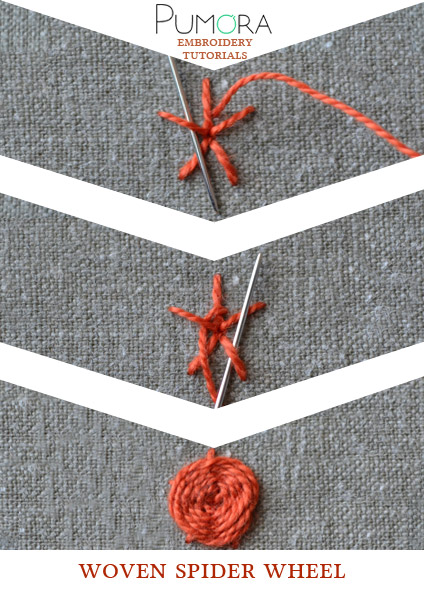
Embroidery stitches for beginners
Learning to make your first embroidery stitches doesn’t have to be hard. Here is a selection of stitches used very often in modern embroidery patterns for beginners:


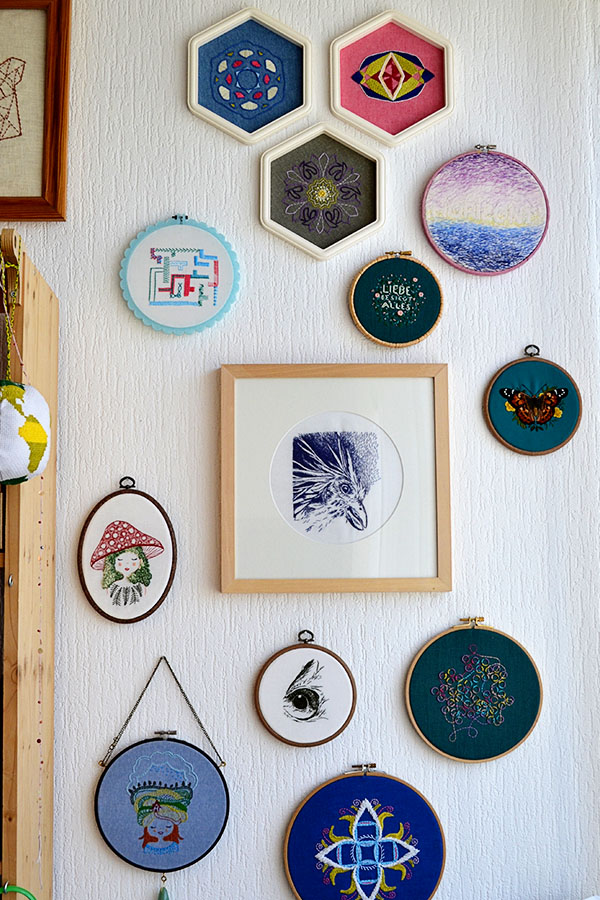
Framing your embroidery in a hoop
After finishing your project, you don’t want your fabric hanging out of the hoop everywhere. If you decide to use your hoop as a frame and hang it like this on the walls, you’ll want to spruce the back up a bit.


Click here for a more in-depth tutorial on how to frame your embroidery in a hoop.
Do you want more tips and tricks on hand embroidery?
Join the Tutorial Alert! It is a biweekly newsletter that contains information about new tutorials & articles on Pumora, tips & tricks, and promotional content like new embroidery patterns or special discount codes.
You’ll receive an email to confirm your subscription to the Newsletter. Please also check your Spam folder and mark the email as no Spam.