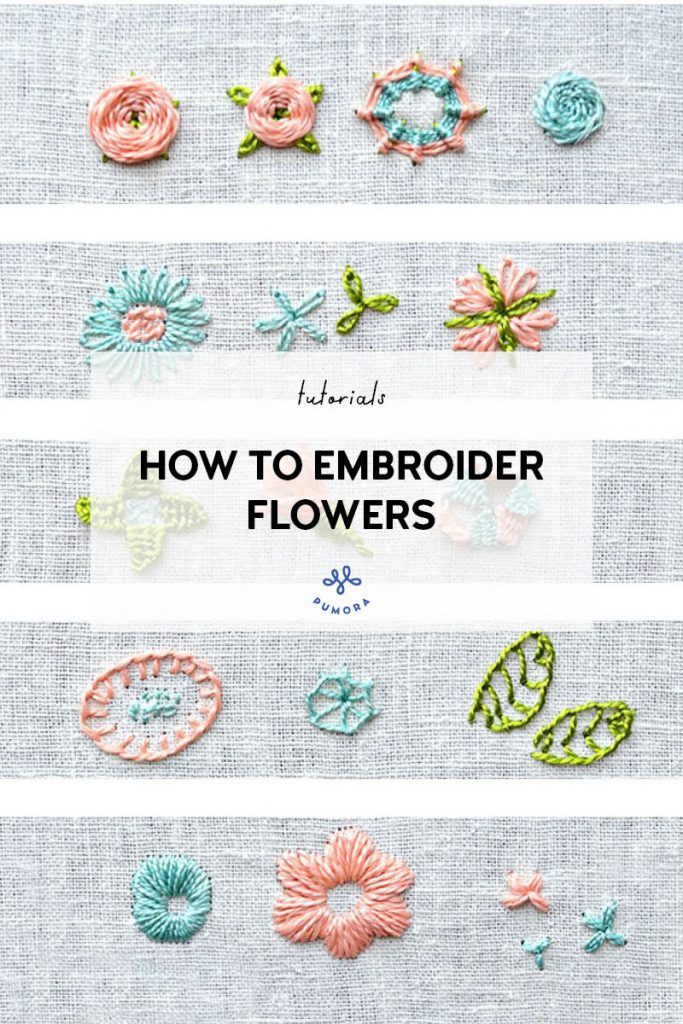
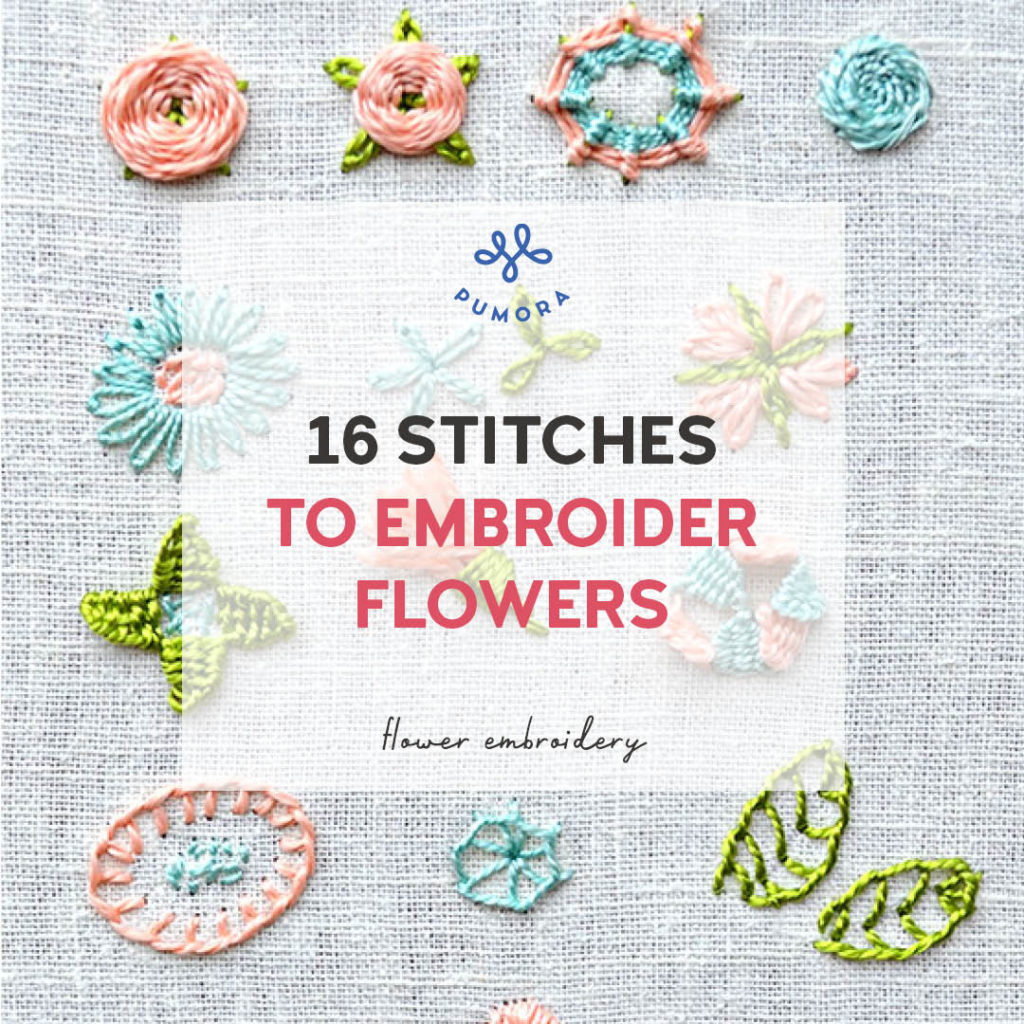
Flowers in embroidery are the most loved motif throughout history. Even today, they pop up everywhere on clothes, in stitched flower wreaths, and more. The great thing is that there are many easy ways to embroider flowers even if you are a beginner. In this article, you’ll get inspiration and instructions on how to embroider flowers with 16 step-by-step stitching tutorials.
If you have never attempted flower embroidery, these little flower designs are a perfect start to floral embroidery! Choose one of the floral motifs below and get your needles moving or do the full flower meadow with the free pattern below!
Now, let’s get started with flower embroidery!
Disclaimer: This article contains affiliate links.

Materials
- cotton or linen fabric in off white 10x10inches
- pearl cotton threads in pink, burgundy, green, lime green, light blue – you can use regular 6stranded embroidery thread, too! In this case, use all 6 strands of the thread.
- embroidery needle
- embroidery hoop 7inch in diameter
- water soluable fabric marker for pattern transfer
How to stitch a flower meadow
Download the free flower embroidery pattern template and transfer the pattern to your fabric. If you are new to embroidery, I highly recommend my beginner embroidery article where you can gain insight into all the basic stuff like pattern transfer and how to start and end threads.
To embroider the flowers, stitch each flower step by step. Because there are so many stitches, I divided them into groups of 3-4. Click on the pictures below for the detailed embroidery tutorials or begin with the basic flower stitches shown below.
Stitches for flower embroidery

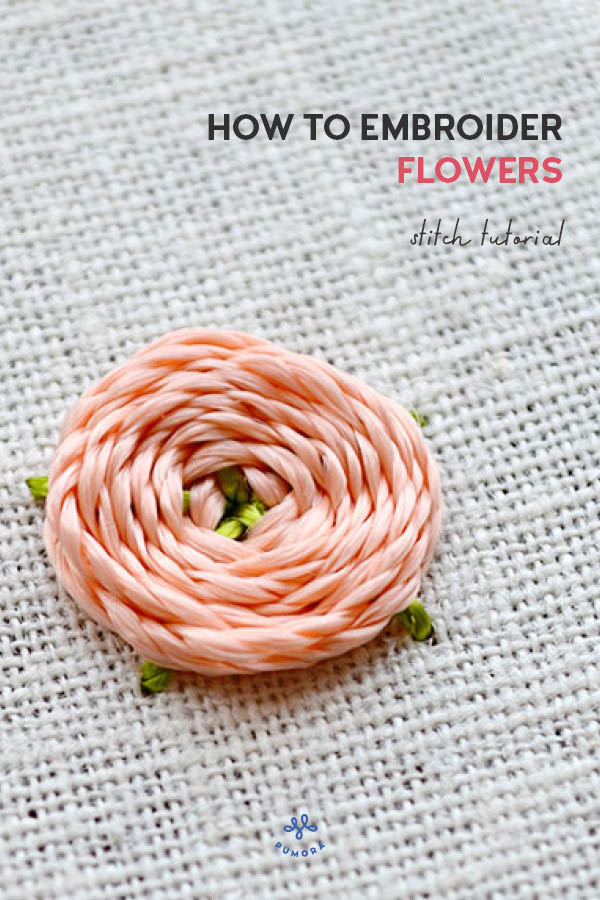
The woven rose and its variations are great to embroider roses, camellias, or peonies.
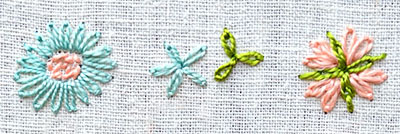
The lazy daisy is the perfect stitch for flowers with long petals like daisies, dandelions, or sunflowers.

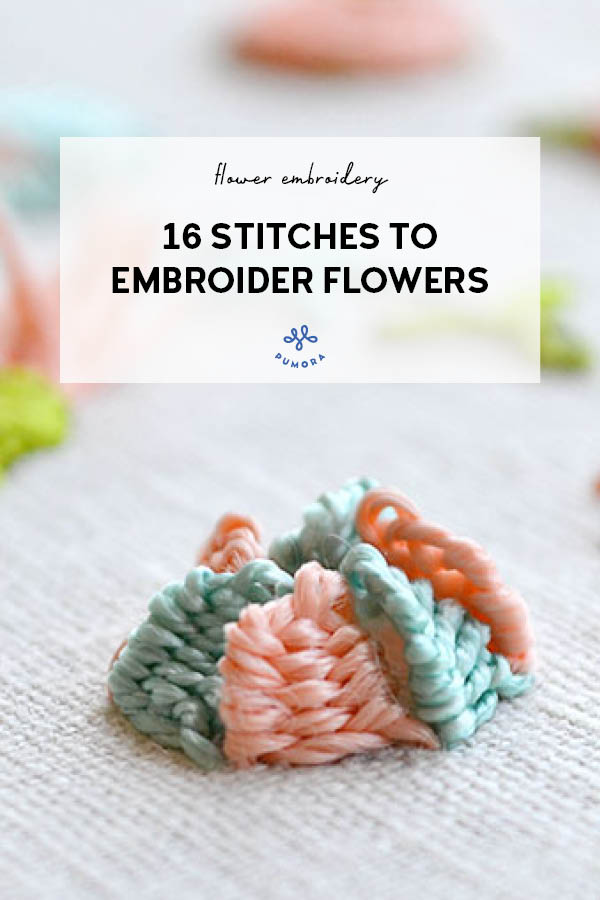
Add more texture to your embroidery with these 3D stitches. Use them for wildflowers or just to add more interest.

Perfect for big and airy flowers like poppies. They are great for leaves, too!

Satin stitch is the stitch to fill out bigger petals. They work great for all kinds of big petal flowers like roses, orchids, or as a small sitch for forget-me-nots.
THE FLOWER EMBROIDERY STITCH BOOK
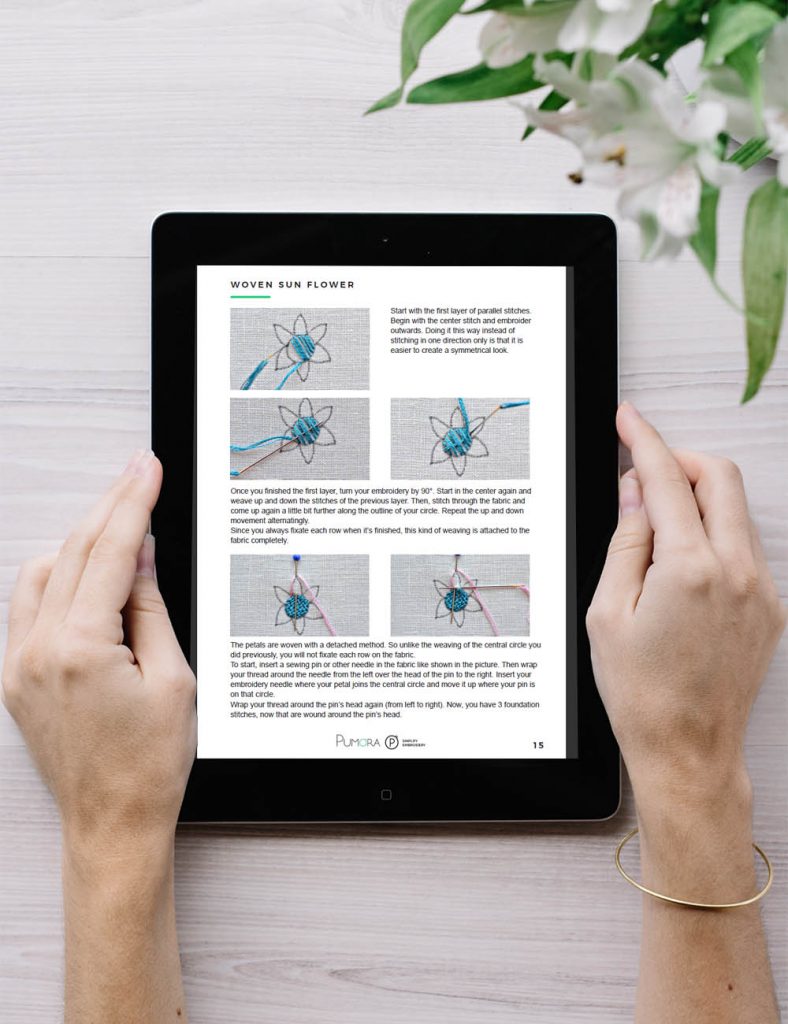
Get even more flower embroidery inspiration in my The Flower Stitch Book. It contains photo tutorials for 24 unique floral designs and teaches you how to embroider a variety of florals in no time.

Video tutorials on how to embroider flowers
If you are more of a visual learner, you might enjoy my flower embroidery video series. There you’ll see heaps of different ways to embroider flowers. From small ones to the big leafy flowers. If the player doesn’t work, click here for the link to my Youtube channel.
You are currently viewing a placeholder content from YouTube. To access the actual content, click the button below. Please note that doing so will share data with third-party providers.
More InformationWoven Roses
Woven roses have become very popular among modern embroidery. It is easy to get why. They are simple and easy even for beginners and they look pretty! But how are woven roses made?
How to embroider the woven rose
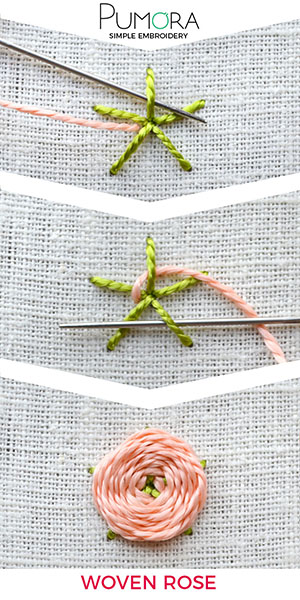
For the woven rose, embroider a set of 3, 5 or 7 single stitches in a circle. Then, bring the needle up in the center and weave up and down these stitches around the circle. This results in a spiral of thread woven around the foundational stitches like a rose.
This is just one method of stitching the woven rose. In this article, you’ll get 3 more step-by-step tutorials on embroidered roses.
Lazy daisy flowers
Lazy daisies are an amazingly simple way to stitch flowers with petals. They can be small or big. With a stitched center or without. There are so many ways to create flowers with this stitch, it is incredible. But how do you do the lazy daisy?

How to embroider the lazy daisy flower
In order to embroider the lazy daisy flower, mark a circle and the center in the size you want the flower to be. Then, embroider a set of 3 or more single chain stitches inside that circle. Always start from the center and embroider to the outside edge.
For more detailed step-by-step instructions, visit the lazy daisy flower article with 2 more variations.
3D flower embroidery
Hand embroidery in itself is quite 3D already. However, there are embroidery techniques that raise the 3D effect to another level. The woven picot stitch is such a stitch I want to introduce to you. It is simple to do once you get the hang of it. It is also a very playful stitch that adds that extra piece of texture to your stitching projects.
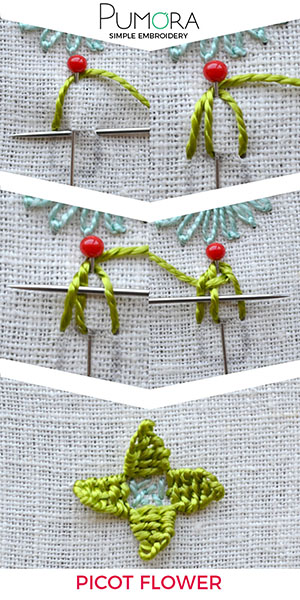
How to embroider the picot flower stitch
For the picot flower, you need a sewing pin or an additional needle. Pin it so that the head of the needle is where the pointy end of the picot will be. Bring the thread up on the left side. Then, wrap the thread around the head of the needle and stitch into the bottom right side. Bring the needle up in the middle and wrap the thread around the pin again from the left. Now, weave up and down the three threads beginning from the right. To finish, pull out the pin.
Big flowers with blanket stitch
Sometimes flowers need to be big and airy. Blanket stitches are commonly used for the bigger flowers in embroidery but they are superb for leaves, too!
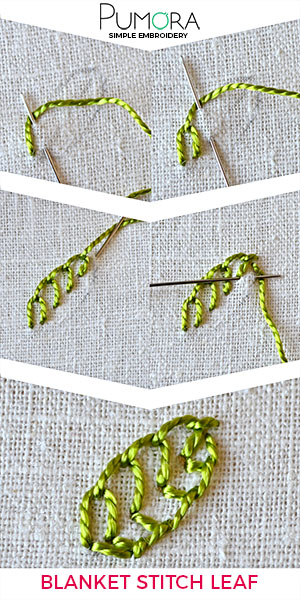
How to embroider a leaf with blanket stitch
For an embroidered leaf, mark your leaf shape with a centerline. Start blanket stitching one side of the leaf up to the top. End the last stitch in line with a short stitch into the pointe end of the leaf. Embroider the second half of the leaf from the top down using blanket stitch again. Try to meet the arms of the stitches with the ones of the previous half. To finish, make a short stitch at the end.
Satin stitch flowers – the queen of fill stitches
Satin
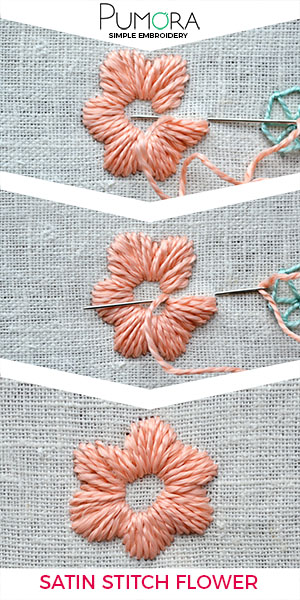
How to embroider flowers in satin stitch
To embroider flowers in satin stitch, mark your flower shape and divide the individual parts of the flowers. Then, make stitches from one side of the shape to the other. Always go in the same direction on top and go back on the back of the embroidery. This results in much neater satin stitches. Fill out each shape this way. Adapt the angle of the stitches to the shape you are filling out.
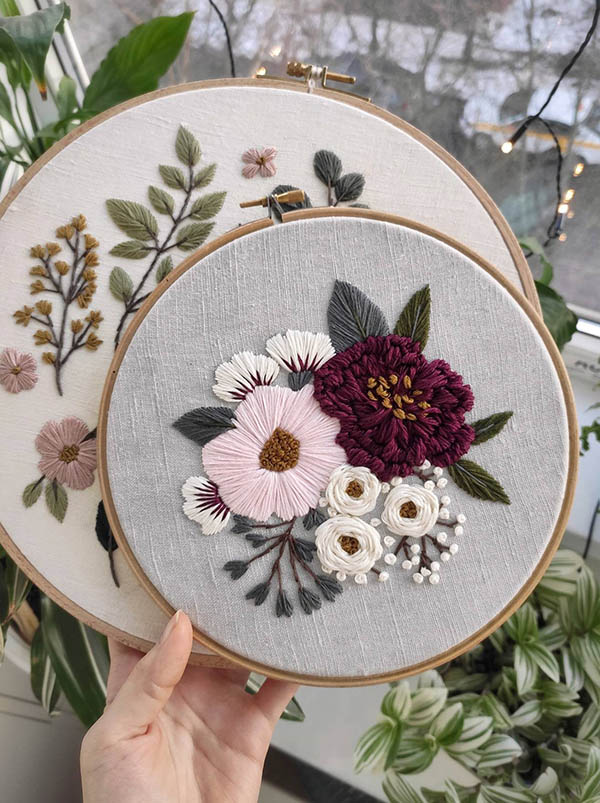
How to use flower embroidery
Now, what do you do with all these flower stitches? There are a lot of flower embroidery patterns out there that are great for beginners and more advanced stitchers. I gathered a list of my favorite floral patterns here. However, you are not just limited to creating pictures for your walls. Flower embroidery has a long history in fashion and thus is fantastic for embellishing your favorite pieces of clothing.
Here are some ways to use flowers in embroidery:
- create inspiring flower wreath quotes
- stitch flower embroidery patterns (I gathered my favorite patterns here)
- repair clothes and textiles by stitching over holes with flowers
- cover up stains with floral patterns
- embellish clothes and home textiles with florals
Especially for mending, you don’t have to use the regular patterns of darning techniques. For example, you can cover up stains and save your favorite textiles or cover those tiny holes in T-shirts that tend to appear every now and then, especially if you have cats.
Embellishing your clothes or home textiles with a spread of freshly stitched flowers also makes each item unique. During the process, you’ll infuse your own ideas and skills into each textile making it something special that only you have. Isn’t it a lovely thought?
Do you want more tips and tricks on hand embroidery?
Join the Tutorial Alert! It is a biweekly newsletter that contains information about new tutorials & articles on Pumora, tips & tricks, and promotional content like new embroidery patterns or special discount codes.
You’ll receive an email to confirm your subscription to the Newsletter. Please also check your Spam folder and mark the email as no Spam.
No time right now? Pin for later!
